

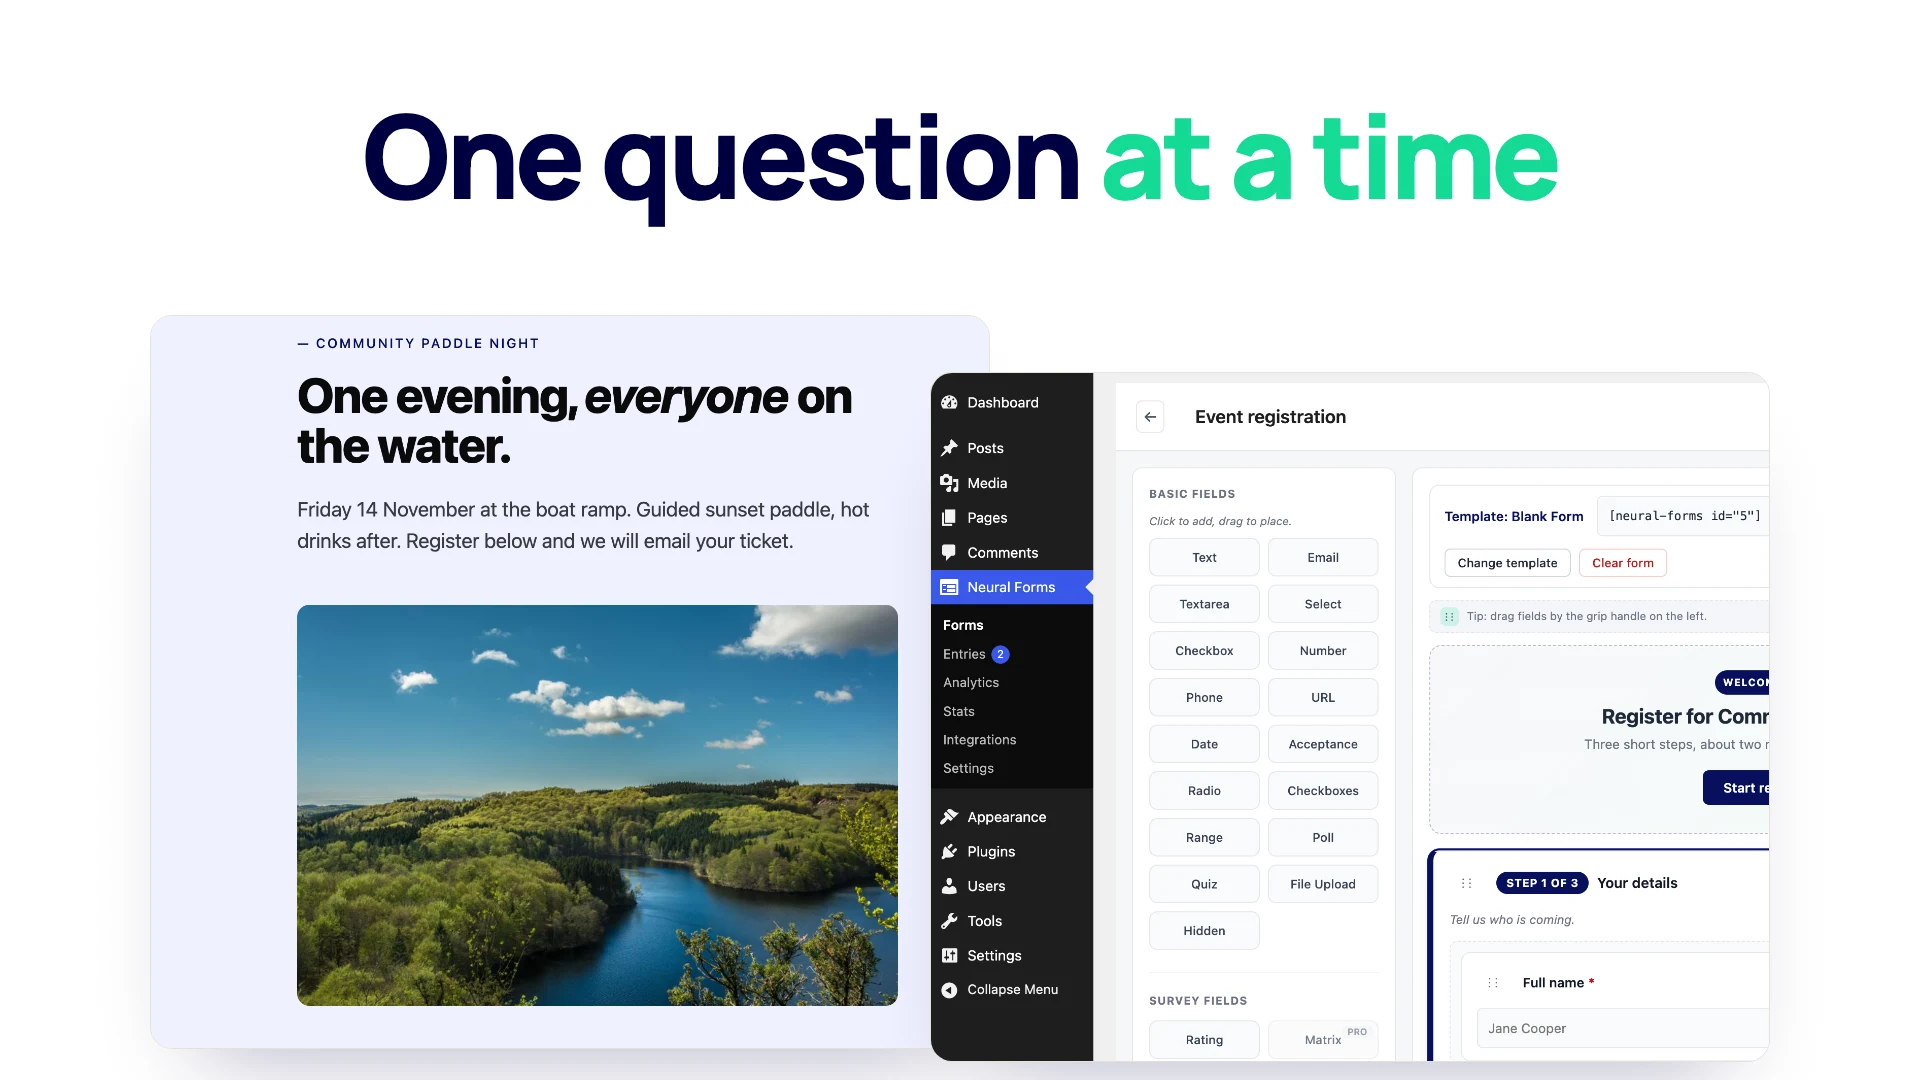
A long form on one page asks for everything at once. Split the same questions into short steps and each screen asks for one thing: who you are, what you want, anything else we should know. People see a smaller task, and you still collect every answer.
This guide builds a three-step event registration form from start to finish with the free Neural Forms plugin. You will add a welcome screen, a progress bar, required fields that are checked before each step moves on, and a field that only appears for students. Every screenshot comes from a real build on a WordPress site with only the free plugin active. Nothing here needs an upgrade or an account.
When a multi-step form helps, and when it does not
Steps are worth it when the questions fall into groups. A registration form has the person, the ticket, and the extras. A quote request has the contact details, the project, and the budget. Each group becomes a step, and each step gets a title that tells people where they are.
- Good fits: event and course registrations, quote requests, job and membership applications, appointment requests, onboarding questionnaires.
- Poor fits: a newsletter signup, or a contact form with three fields. If the whole form fits on one screen, keep it on one page. An extra click adds work without saving any.
- A quick test: if you cannot name a step in two or three words, the questions in it do not belong together. Regroup them.
Put the questions people answer without thinking (name, email) first, and the ones that take effort later. By the time someone reaches the harder questions, they have already started.
What you need
- WordPress 6.8 or newer and PHP 7.4 or newer.
- Neural Forms, free from WordPress.org. In your dashboard go to Plugins > Add New, search for “Neural Forms”, click Install Now, then Activate.
- No account, API key or third-party service. The builder, steps, notifications and the entry inbox all work without one.
Step 1: Plan your steps before you build
Five minutes on paper saves rearranging fields later. Here is the plan for the example form, a registration for a community paddle night:
| Screen | Title | Fields |
|---|---|---|
| Welcome screen | Register for Community Paddle Night | None, only a Start registration button |
| Step 1 | Your details | Full name, Email address, Phone number |
| Step 2 | Your ticket | Ticket type (Standard, VIP, Student), Number of seats |
| Step 3 | Almost done | Student ID number (students only), Access needs or questions, consent checkbox |
Three steps of two or three fields each. No step scrolls on a laptop screen, and every title says what the step is about.
Step 2: Start a blank form, or a multi-step template
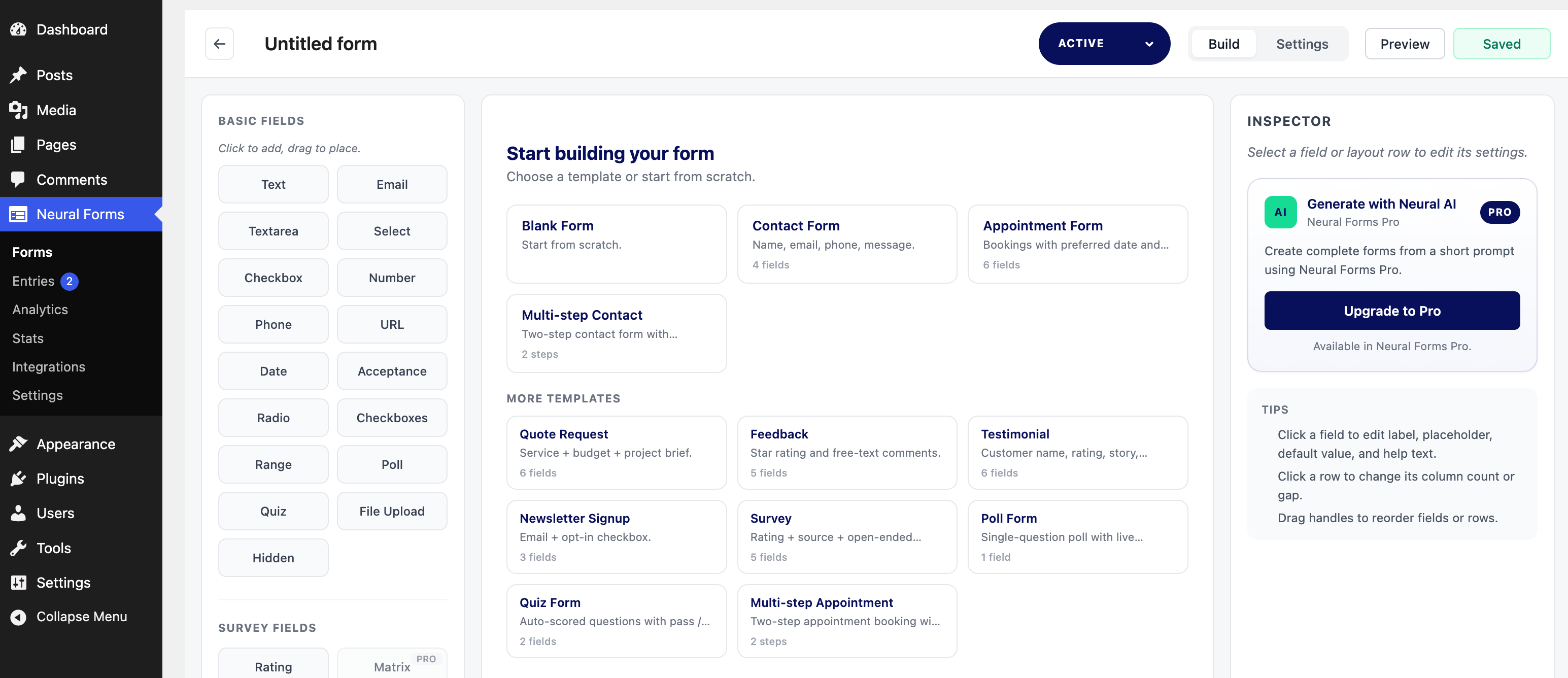
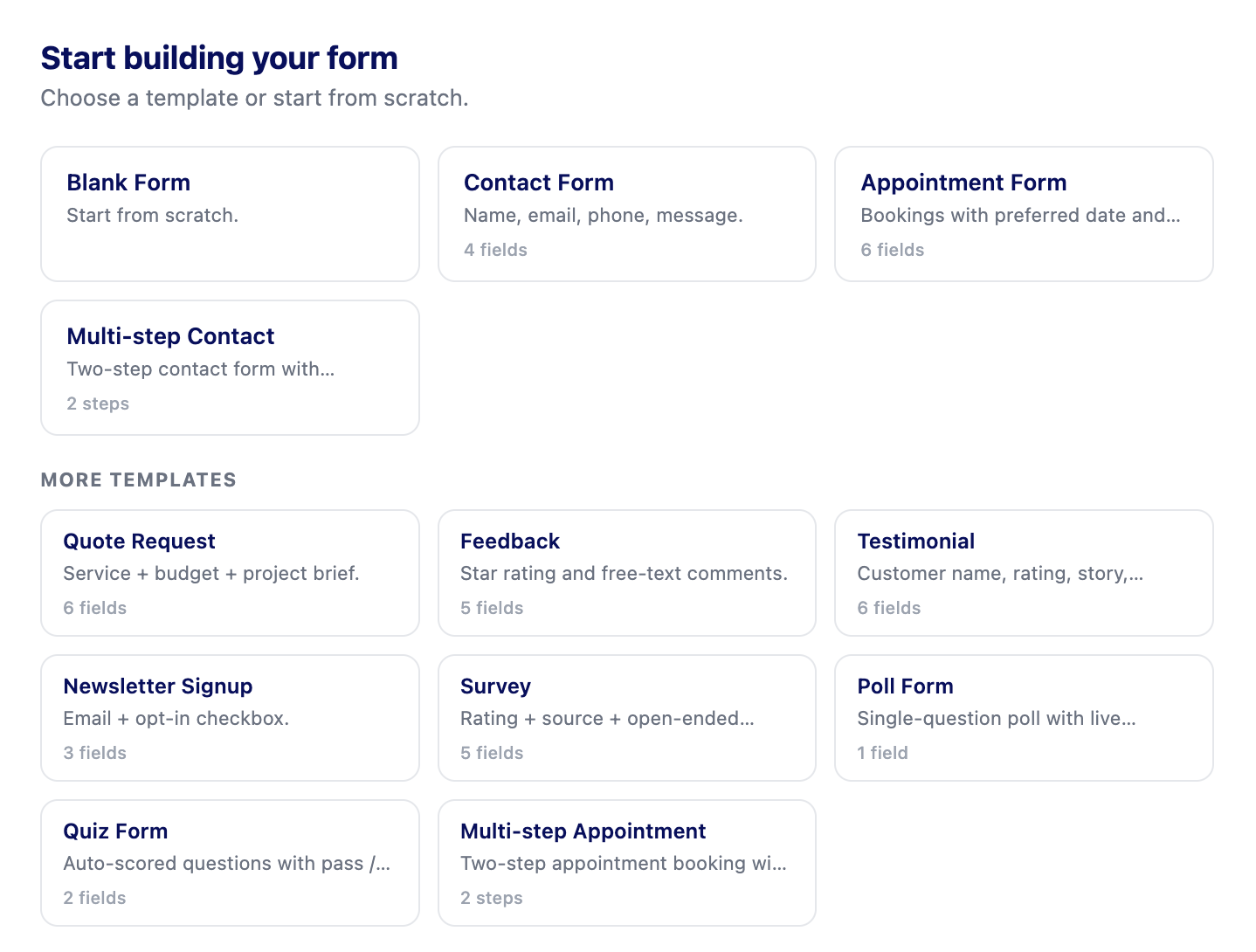
Go to Neural Forms > Forms and click + New Form. The starter screen offers a blank form and ready-made form templates, including two that already have steps: Multi-step Contact and Multi-step Appointment. If one of those is close to what you need, pick it and edit the fields.
To follow this guide, pick Blank Form, then click Untitled form at the top and give the form a name you will recognize later, such as “Event registration”.
Step 3: Add steps and put fields inside them
The builder has three columns: the field list on the left, your form in the middle, and the settings for whatever you select on the right. At the bottom of the field list, under Layout, are Row, Step, Section and Welcome Screen.
- Click Step. A box labeled “Step 1 of 1” appears in the middle column.
- With the step selected, click a field in the list, for example Text. The field is added inside that step. You can also drag any field by its grip handle into a step.
- Click the field to edit it on the right: Label, Placeholder, Required, Default value, Help text and Width. The Phone field also has a country code dropdown with a default country.
- Click Step again for step 2, select it, and add its fields. Repeat for step 3.
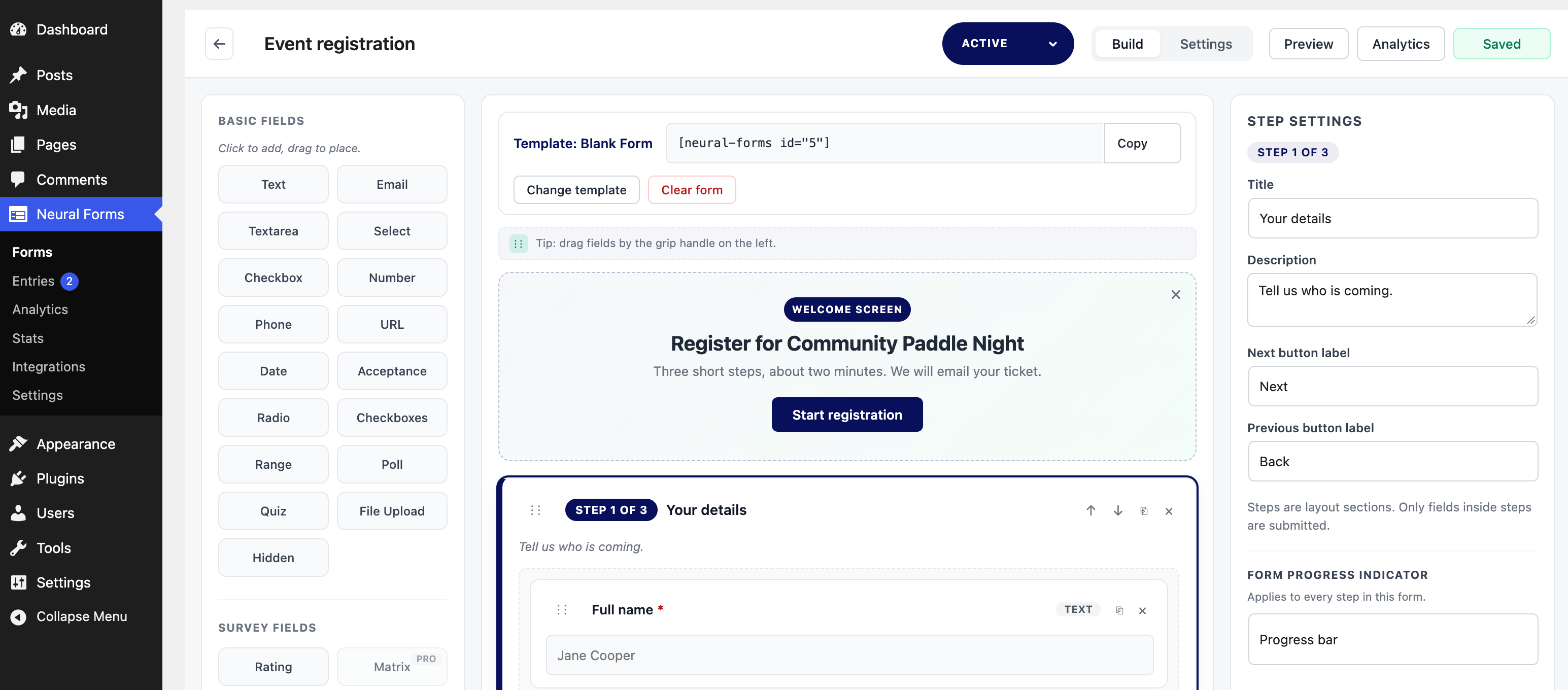
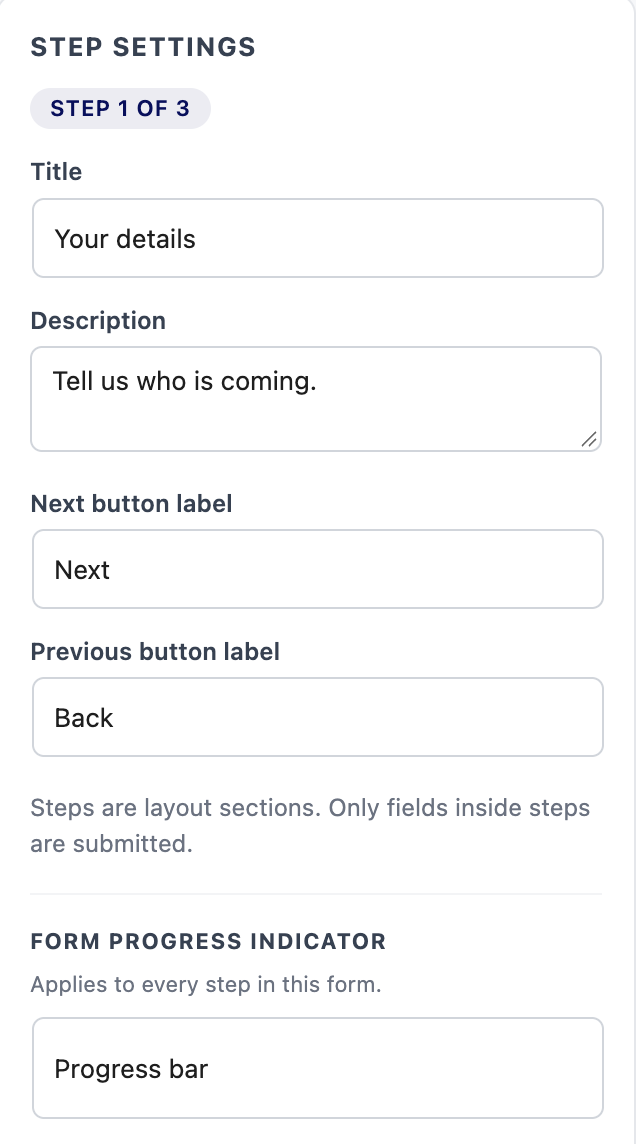
One rule matters more than any other here. The step settings panel says it plainly: “Steps are layout sections. Only fields inside steps are submitted.” A field that lands outside every step box is easy to miss in the builder, so before you move on, check that each field sits inside a step.
Name each step
Click a step’s header to open its settings. Each step has a Title, a Description (a line of helper text shown above the fields), a Next button label and a Previous button label. If you add the form with the Neural Multi Step block (step 8), the block’s own button text is used instead, so set the labels there. Titles such as “Your details” and “Your ticket” tell people what each screen wants before they read a single field.
Step 4: Add a welcome screen
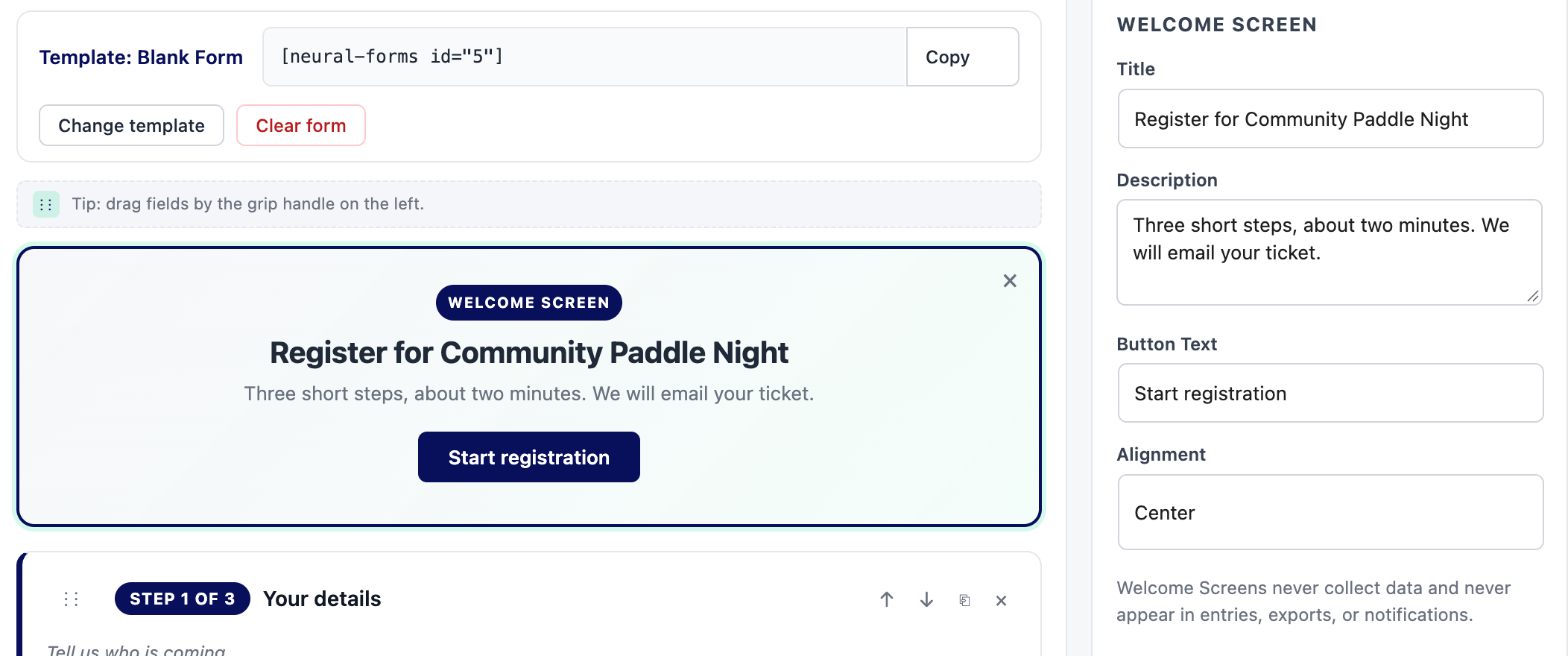
A welcome screen is the first thing people see, before step 1. Click Welcome Screen under Layout and fill in its Title, Description, Button Text and Alignment. A form can have one.
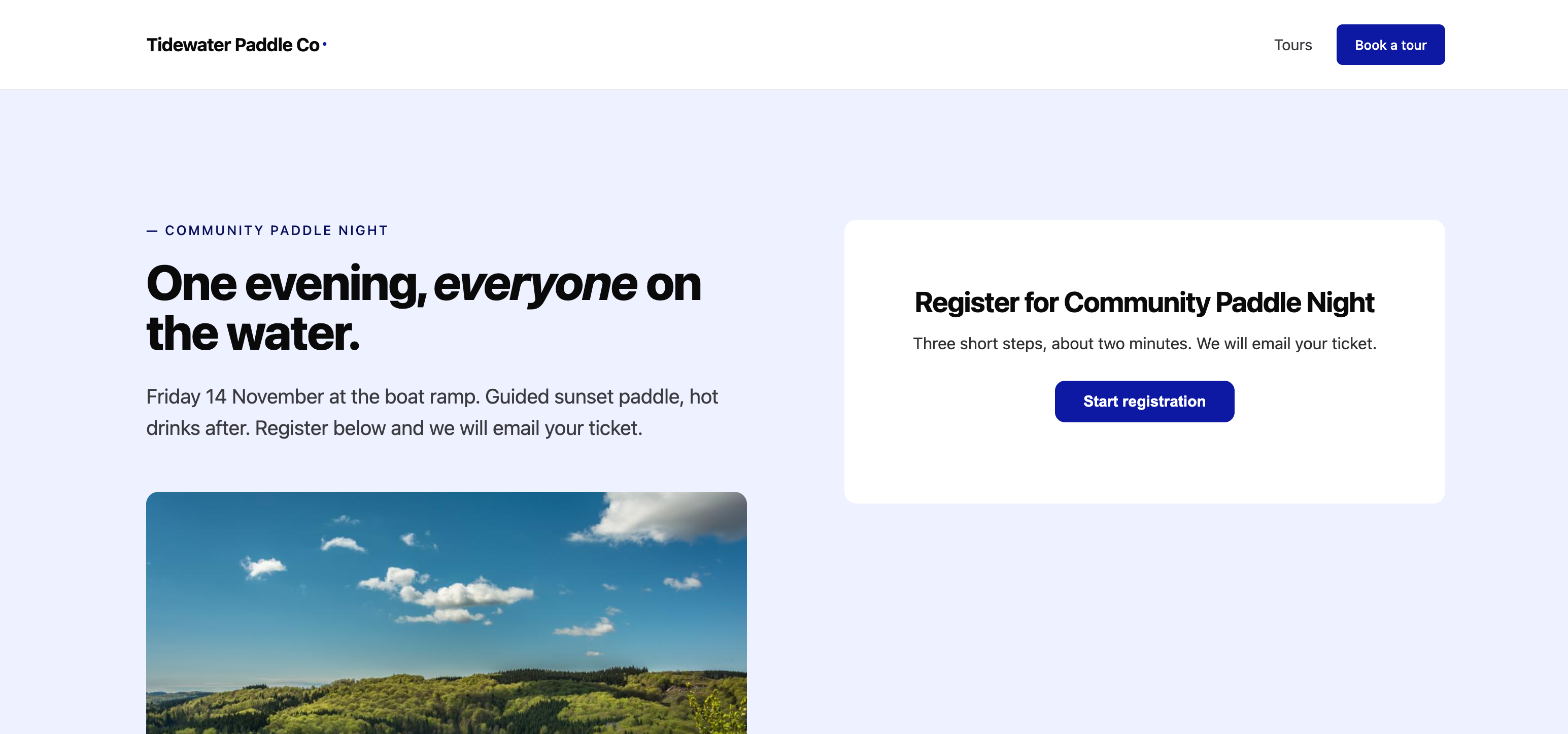
Use it to set expectations: how many steps, how long it takes, and what happens at the end. The example says “Three short steps, about two minutes. We will email your ticket.” The welcome screen never collects data, and it does not appear in entries, exports or notification emails.
On the page, visitors see the title, the description and one button:
Step 5: Choose how progress is shown
At the bottom of any step’s settings is Form progress indicator. It applies to every step in the form and has three choices:
- Step numbers: numbered step titles along the top, with the current step highlighted.
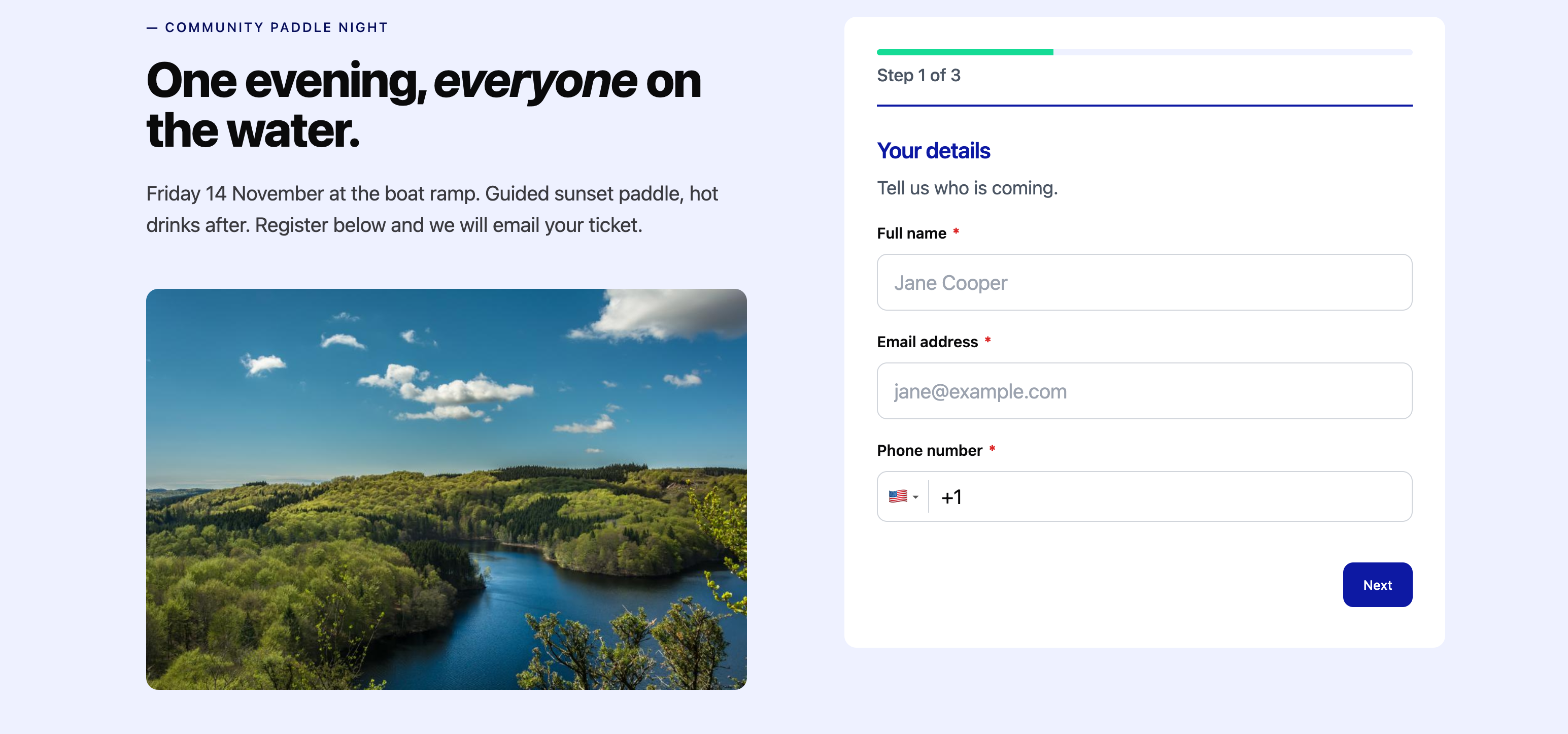
- Progress bar: a bar that fills as people move forward, with “Step 1 of 3” underneath.
- None: no indicator.
For three steps, either indicator works. The bar suits forms where the step titles are long; numbered titles suit forms where people benefit from seeing what is coming. The Neural Multi Step block has its own Step Progress setting, and the block’s choice is the one visitors see (more on that in step 8).
Step 6: Make fields required and check every step
Tick Required on every field you cannot do without. When someone clicks Next, Neural Forms checks the required fields on that step, not only at the end. If one is empty, the step does not move on, the field is outlined, and a message under it names the field: “Full name is required.” Email and Phone fields are also checked for format, so “priya@” or a two-digit phone number gets a message too. Radio buttons and checkboxes, including a consent box, are the exception: they are checked only when the form is submitted. At that point every answer is checked again on the server, and the entry is not saved until every required answer is there.
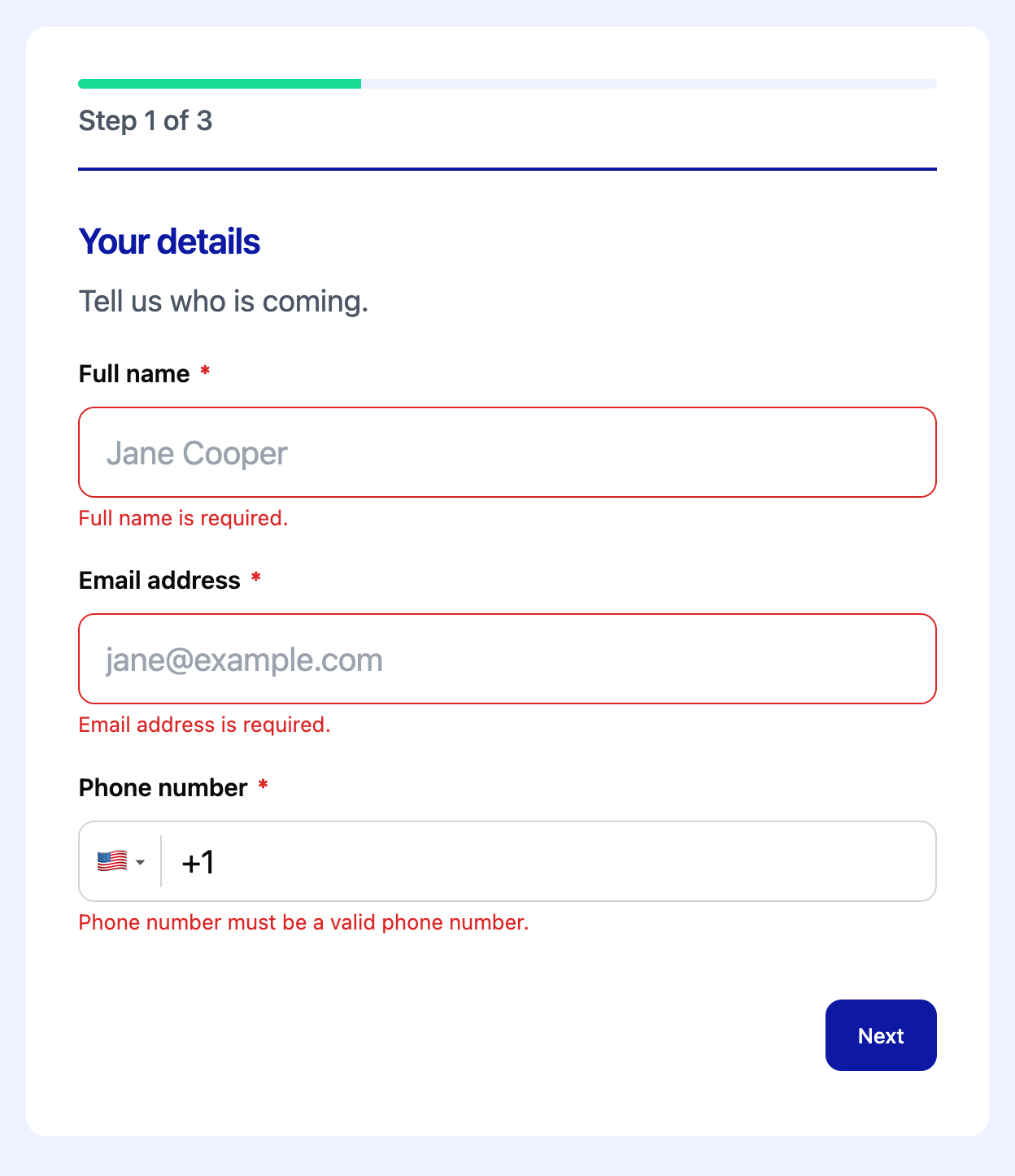
Two tips from building this form:
- The message uses the field’s label, so write labels that read well in a sentence: “Email address is required” is clearer than “Email* is required”.
- Mark the Phone field as required. In version 1.1.2 an optional Phone field still holds its country code (for example +1) when left empty, and the step treats that as an invalid number, so people cannot move on without typing one.
- Put required radio buttons and checkboxes, such as a consent box, on the last step where you can. They are checked when the form is submitted, not on Next, so on the last step the message appears right where people are looking.
Show a field only when it is needed
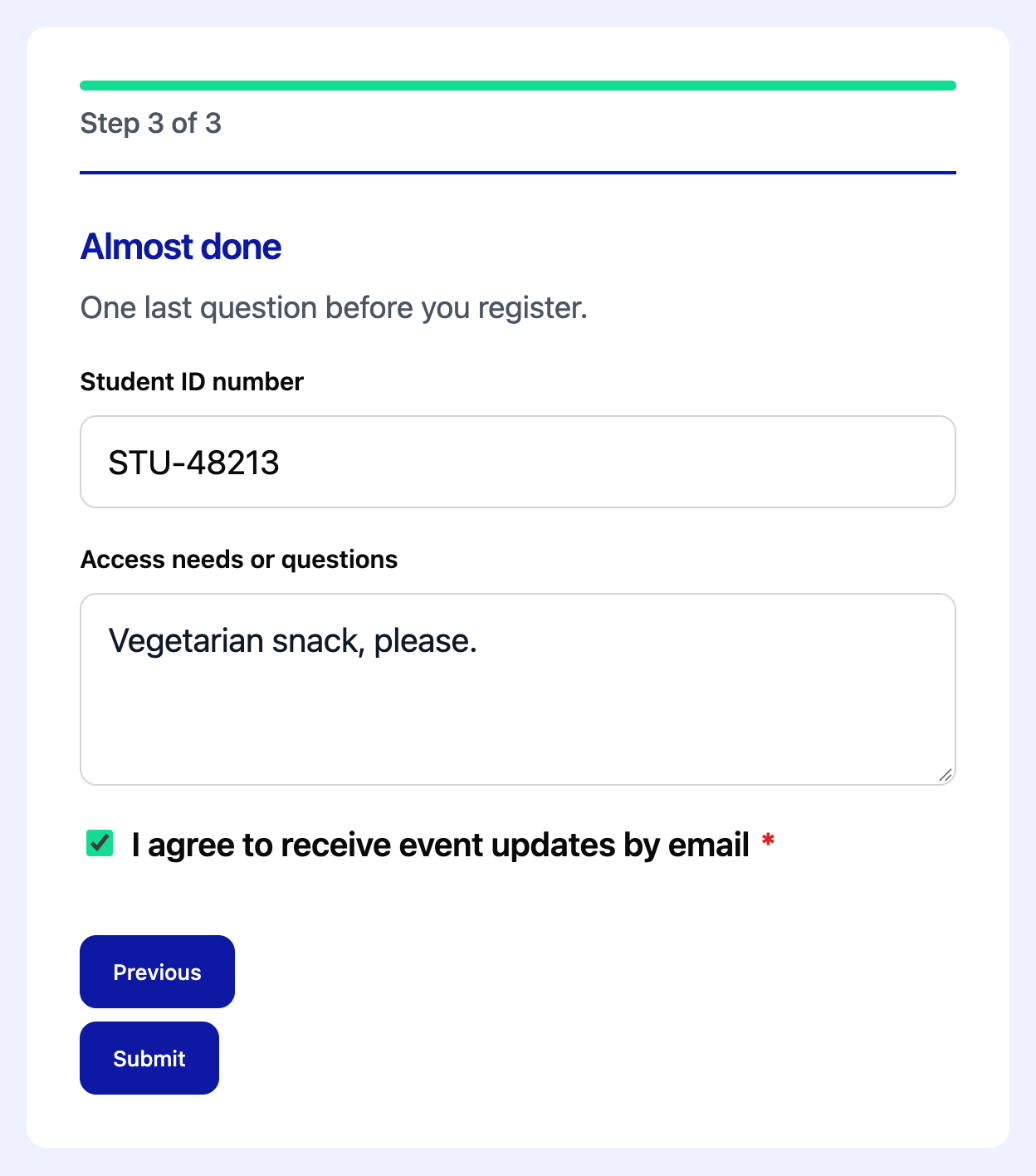
Students need to give a student ID; nobody else does. Instead of asking everyone, the example shows the Student ID number field on step 3 only when someone picked Student on step 2.
- Select the field you want to show or hide.
- At the bottom of its settings, tick Enable conditional logic.
- Under Show this field if, pick the Field (Ticket type), the Operator (equals) and the Value (Student).
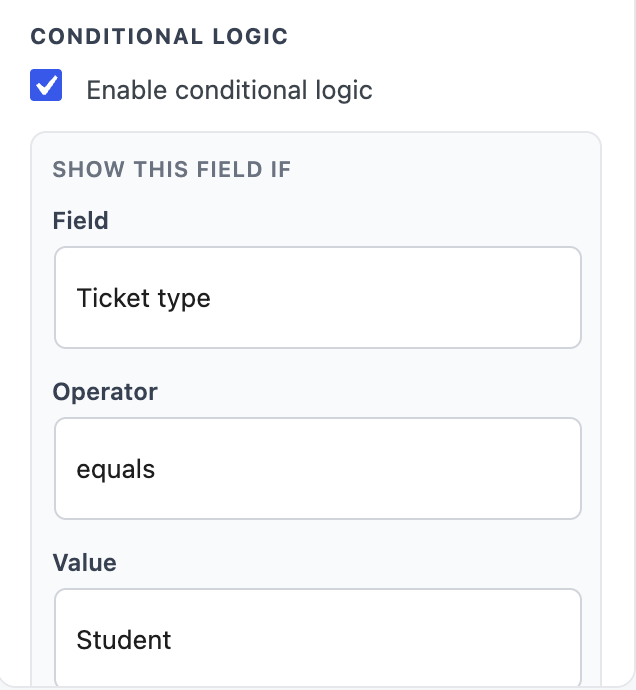
The rule can use any field in the form, including one on an earlier step. The operators are equals, does not equal, contains, is empty and is not empty, plus “is greater than or equal to” and “is less than or equal to” for Number, Range and Rating fields. Each field takes one rule. The conditional logic page covers more patterns.
Here is the result. A visitor picks Student on step 2:
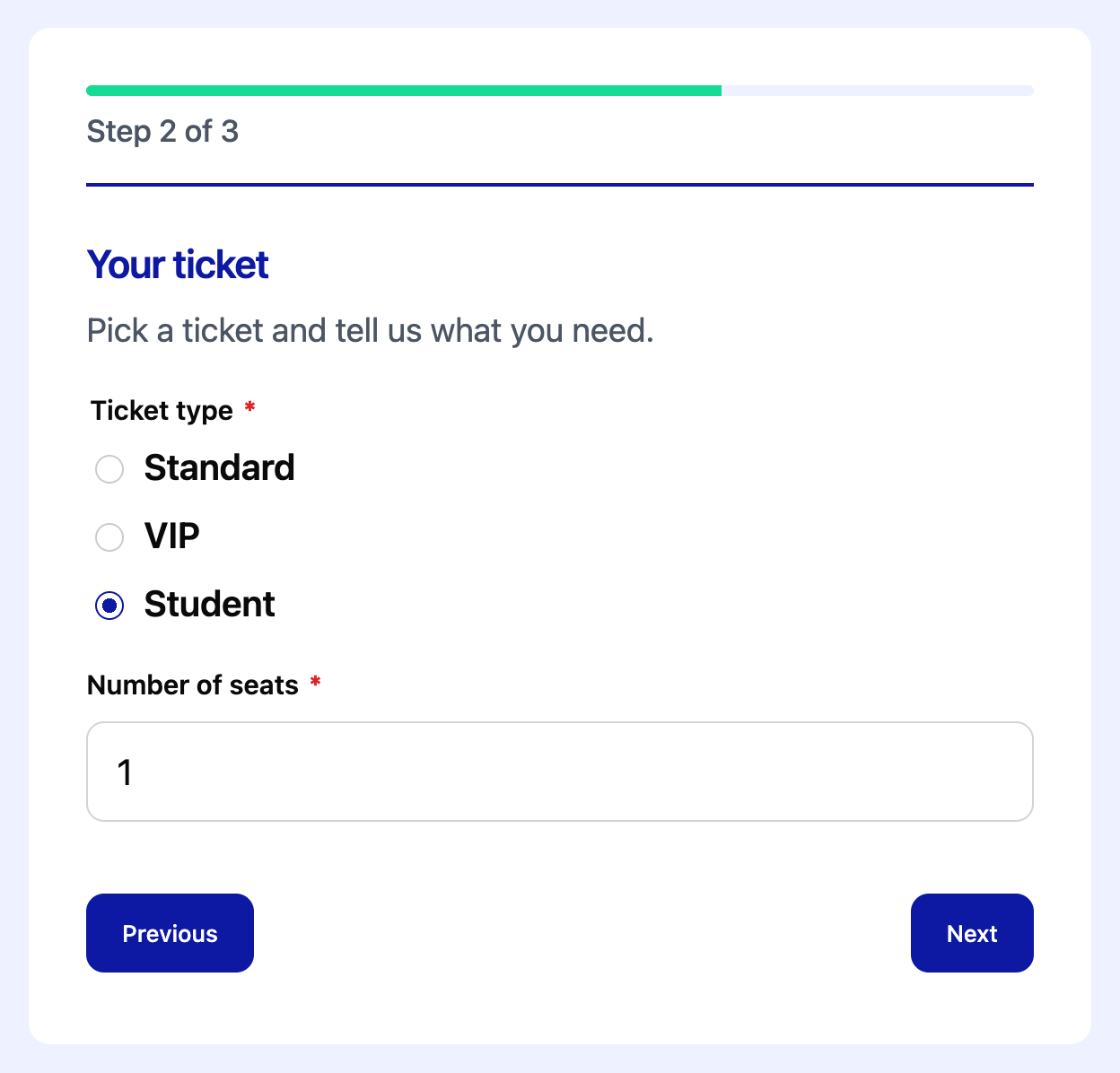
and the Student ID field appears on step 3. Pick Standard or VIP instead and step 3 shows only the last two fields.
Step 7: Decide what happens after submit
Switch from Build to Settings at the top of the builder.
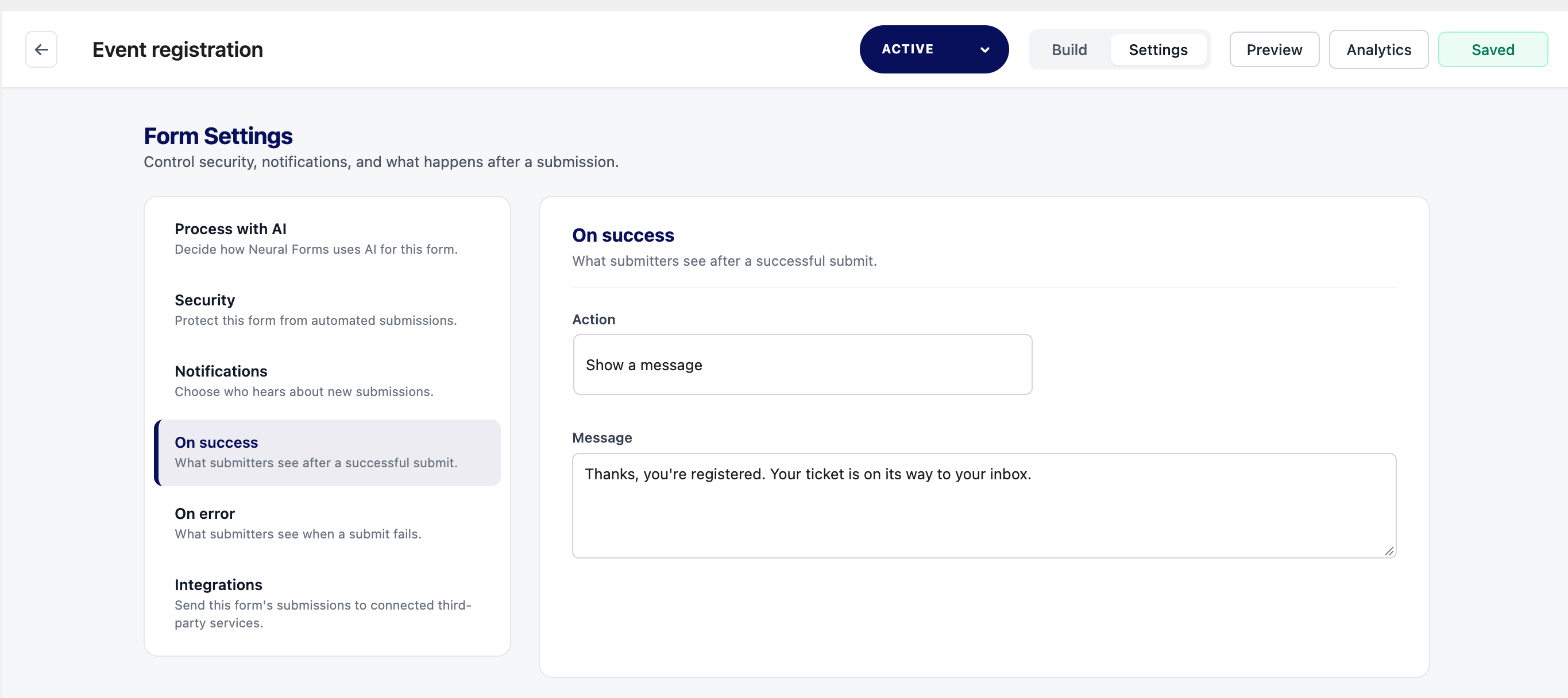
- On success: choose Show a message and write what people see after they submit, or choose Redirect to a URL to send them to a thank-you page.
- On error: the same two choices, for a submission that fails.
- Notifications: turn on the admin notification for this form and enter the addresses that should get each entry, separated by commas. Leave it blank to use the WordPress admin email.
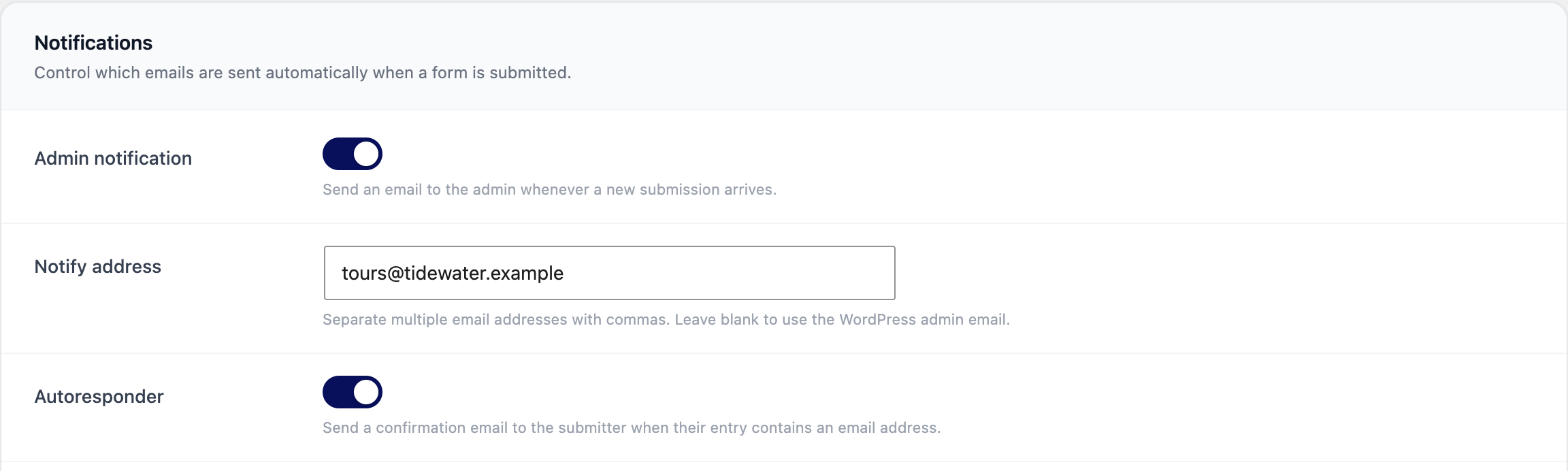
To email the person who filled in the form, go to Neural Forms > Settings > Notifications and turn on Autoresponder. It sends a confirmation email to the submitter when their entry contains an email address. On the same screen, Email Settings sets the sender name and address and has a Send test email button. Click Save settings when you are done.
Neural Forms sends email through WordPress’s built-in mail function. If test emails land in spam or never arrive, install an SMTP plugin and connect it to a mail service.
Step 8: Add the form to a page with the Neural Multi Step block
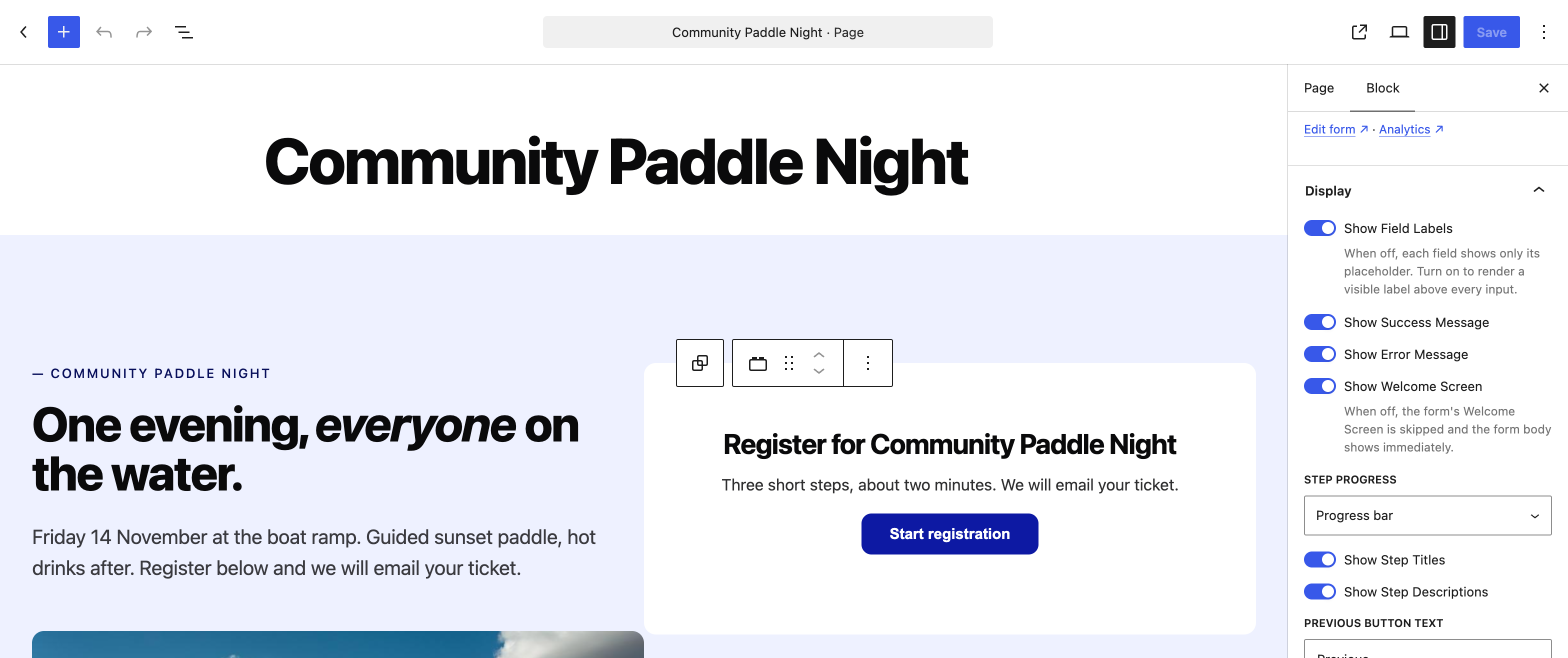
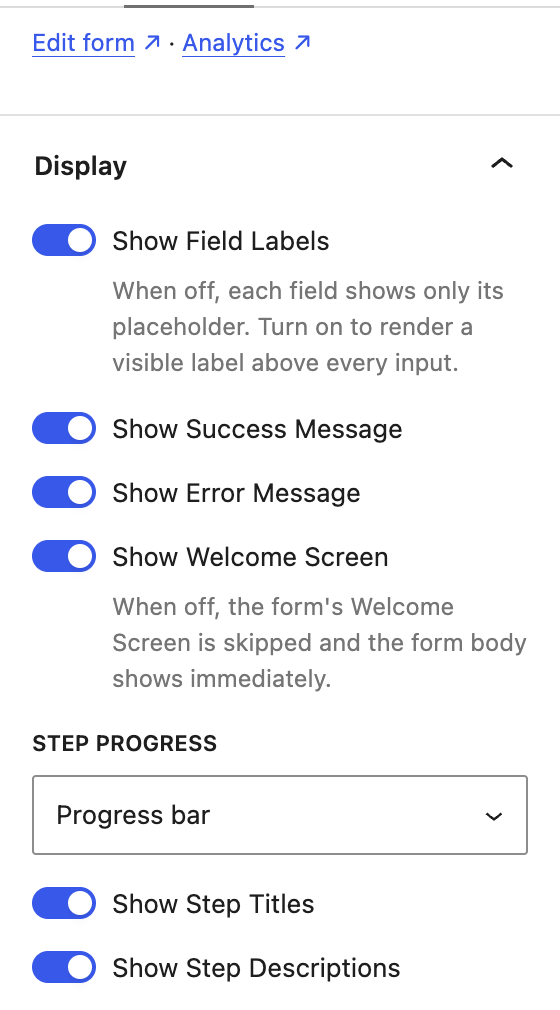
Open the page in the block editor, add the Neural Multi Step block, and choose your form under Select form. The block lists forms that have two or more steps. Then open the Display panel in the block settings:
- Show Field Labels: turn this on. When it is off, each field shows only its placeholder, which disappears as soon as someone starts typing, and a group of radio buttons shows its options without the question.
- Show Welcome Screen, Show Success Message, Show Error Message: leave these on unless you want to skip one.
- Step Progress: Step numbers, Progress bar or None. This setting decides what visitors see, and it starts at Step numbers, so set it to match your choice in step 5.
- Show Step Titles, Show Step Descriptions: on, so the titles you wrote in step 3 appear.
- Previous Button Text, Next Button Text: the button labels visitors see on the page.
Not using the block editor? The builder shows a shortcode at the top of the form, such as
Step 9: Test it before you share it
Open the page in a private browser window (so you see it the way visitors do) and work through this list:
- Click Next on each step with the fields empty. Every required field should show its message, and the step should stay put. Radio buttons and checkboxes are the exception: leave a required one empty, submit the form, and it should be refused with a message under that field.
- Fill in a step, go forward, then click Previous. Your answers should still be there.
- Try every branch. Pick Student, then pick another ticket, and check that the Student ID field appears only for students.
- Use only the keyboard: Tab between fields, arrow keys or Space for the radio buttons, and Enter on the buttons.
- Open the page on a phone, or narrow the browser window, and go through all three steps.
- Submit a real entry with your own email address. Check that the success message appears, the entry arrives in the inbox, and both the admin email and the confirmation email arrive.
Where the entries go
Every submission lands in Neural Forms > Entries, the lead inbox. One submission is one entry, with the answers from all three steps together under their field labels. Fields that stayed hidden are left out, and the welcome screen never appears.
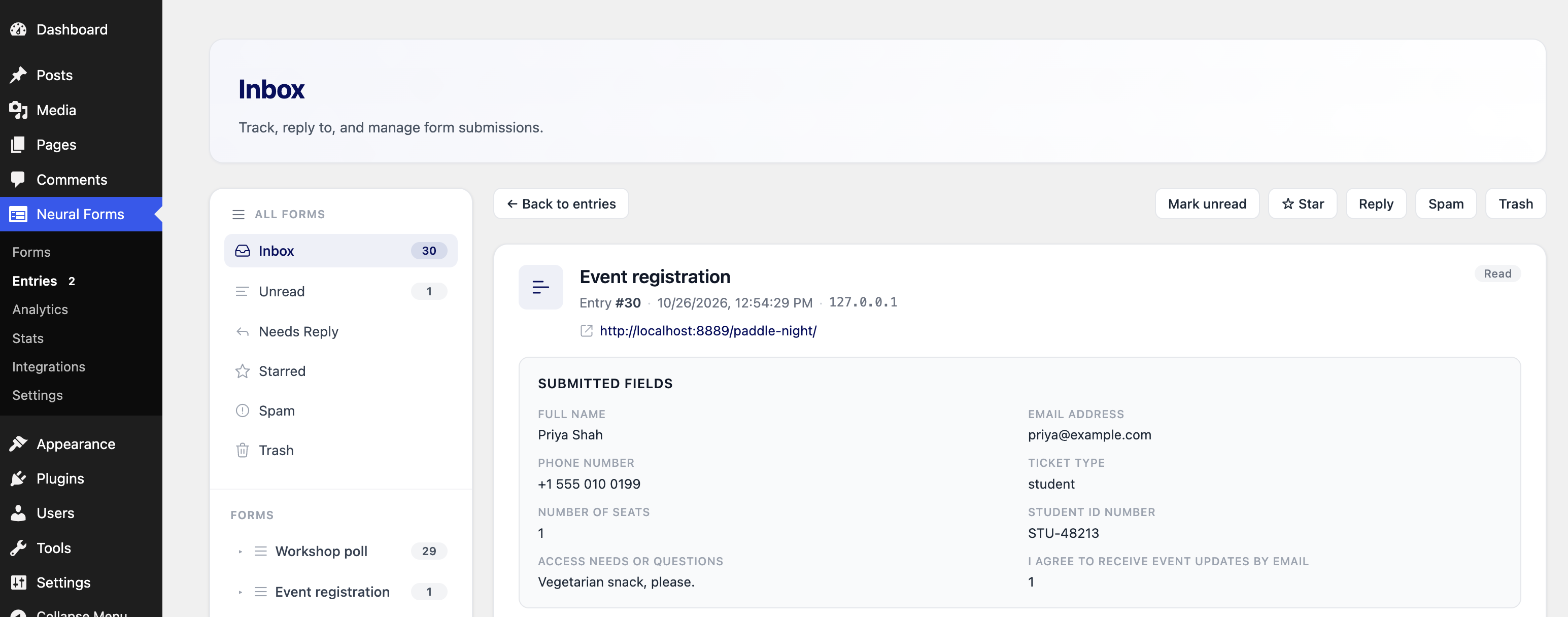
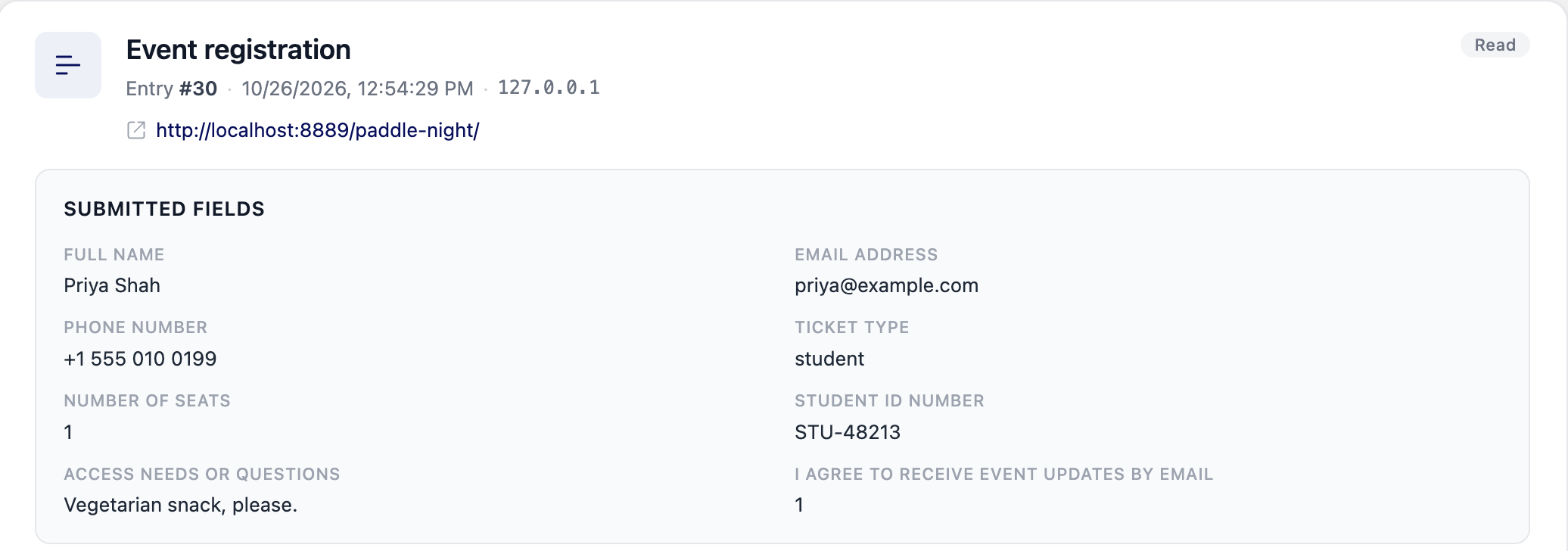
From the inbox you can mark entries read or unread, star them, move them to spam or trash, search, sort by date, reply, and click Export CSV to download entries for a date range. For an event, the CSV export gives you the attendee list.
What the free version does not do
It is better to know the limits before you plan a long form:
- No save and continue later. Nothing is stored until the visitor clicks Submit. Someone who closes the tab on step 2 leaves no entry, so keep each step short enough to finish in one sitting.
- Logic shows or hides fields, not whole steps. To skip a step’s questions for some people, add a rule to each field in that step. The step itself, with its title, still appears.
- One rule per field. A field can depend on one other field’s answer.
Frequently asked questions
How many steps should a multi-step form have?
As many as you have groups of questions, and no more. Give each step one topic. If a step has a single field, merge it with its neighbor; if a step scrolls past the screen, split it.
Do multi-step forms work on mobile?
Yes. Each step shows on its own, and rows with several columns stack on narrow screens. Test every step on a phone before you publish, because a step that fits a laptop may still scroll on a small screen.
Is Neural Forms free?
Yes. Neural Forms is free on WordPress.org, and everything in this guide (steps, the welcome screen, progress indicators, conditional logic, notifications, the entry inbox and CSV export) is in the free plugin. You do not need an account or an API key.
Can I show a question based on an answer from an earlier step?
Yes. A conditional logic rule can use any field in the form. In this guide, the Student ID field on step 3 appears only when Student was picked on step 2.
Why won’t my Next button move to the next step?
A required field on that step is empty or in the wrong format. Look for the red message under a field. If the step has an optional Phone field, mark it required: in version 1.1.2 an empty optional Phone field still holds its country code and fails the check.
Will a multi-step form slow down my site?
Neural Forms loads its form scripts and styles only on pages that show a form, and its admin screens load only inside the Neural Forms menu. Pages without a form do not load its form scripts or styles.
Build your first multi-step form
Plan your steps on paper first, then follow the order above. Install the free plugin, start from Blank Form or the Multi-step Contact template, and test it with your own email before you share the link. For a feature overview and more examples, see multi-step forms in Neural Forms, or the event registration form use case.

Leave a Reply