

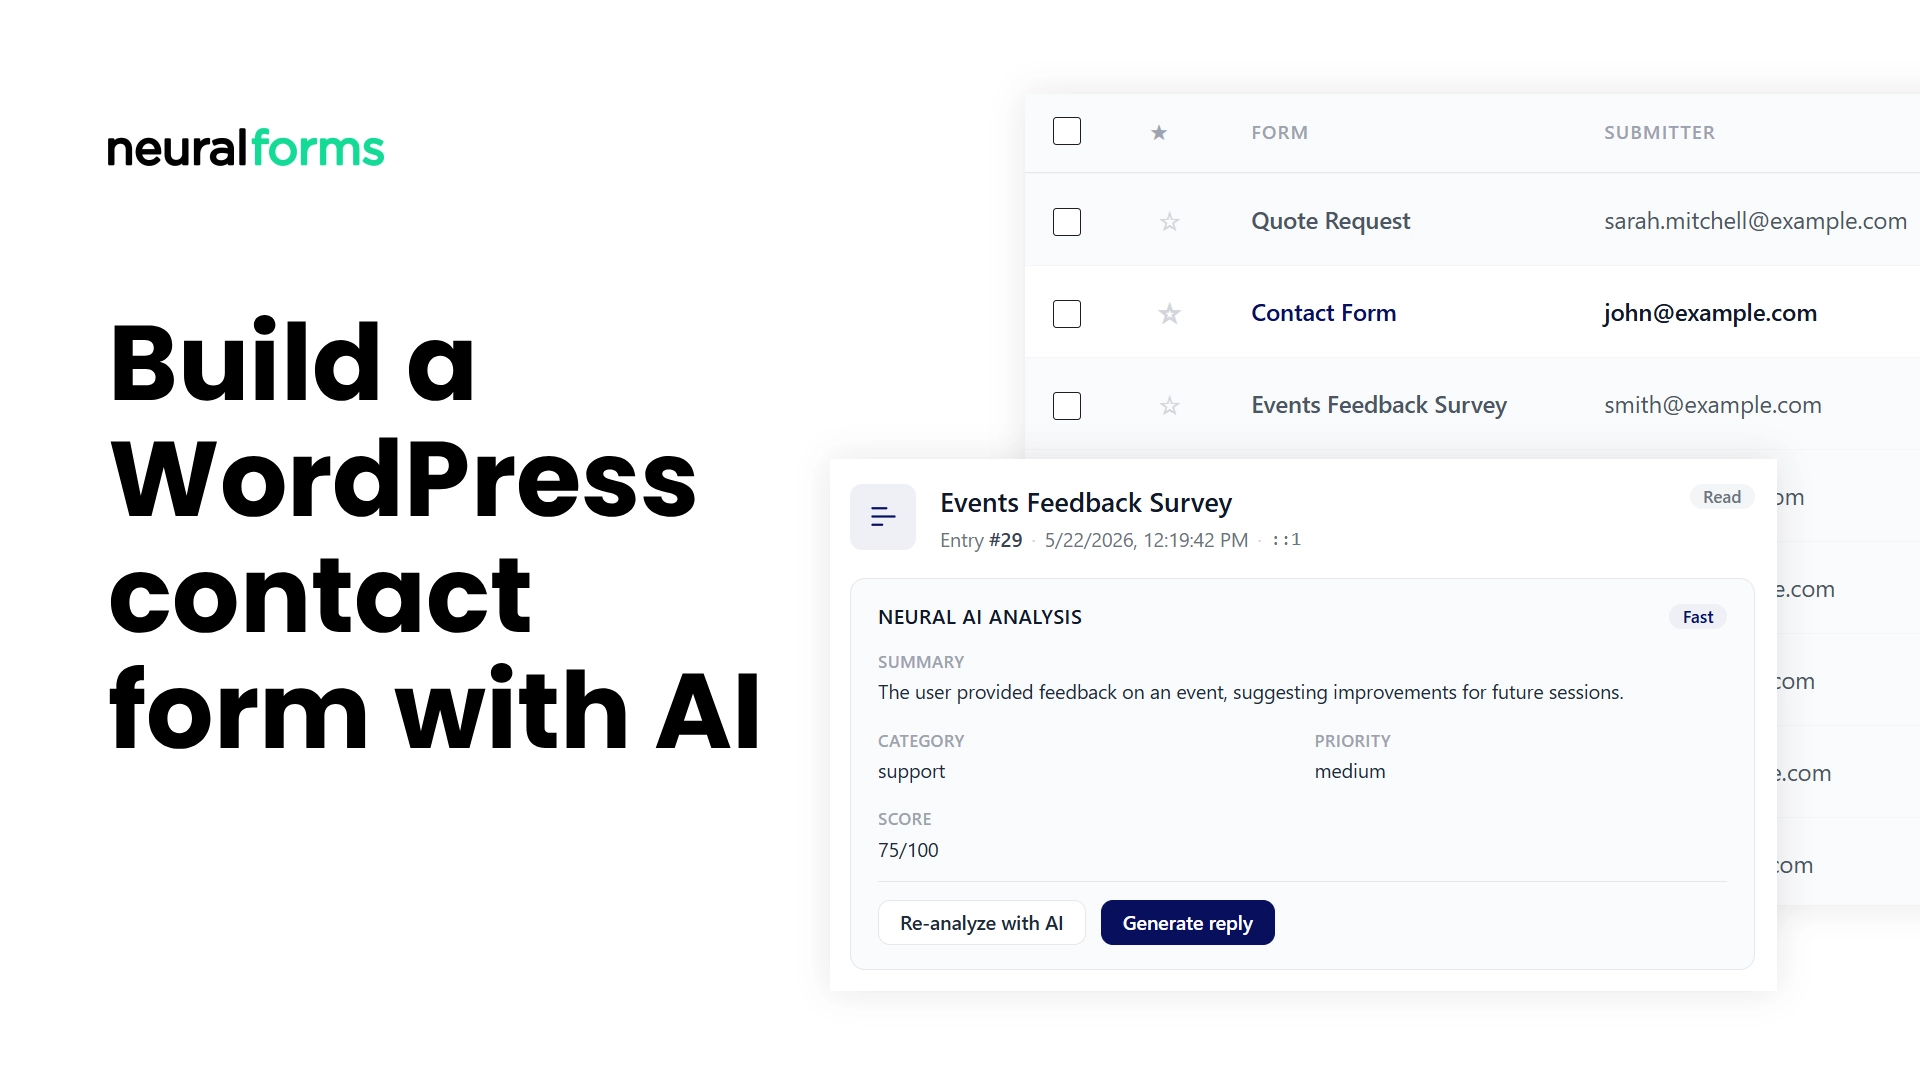
If you run a site using WordPress, you have a contact form. It collects messages from visitors and sends them to your email. After that, you’re on your own.
Most contact forms stop at “submission sent.” A visitor fills it out, an email lands in your inbox, and the rest is manual. You read each message, decide if it’s a sales lead or a support question or spam, prioritize what to respond to first, and type out replies one at a time.
This guide shows you how to build a contact form that does the next step for you, using AI to summarize, categorize, prioritize, and even draft replies. The whole setup takes about 10 minutes, no coding required.
What you’ll have at the end
After following this guide:
- A working contact form on your WordPress site with fields for name, email, message, and any custom fields you want
- Every submission automatically analyzed by AI with a summary, category (sales, support, inquiry, complaint), and priority score from 0 to 100
- A draft reply generated for each submission, ready for you to review and send from inside WordPress
- An email-style inbox where you can search, filter, mark as read, star important leads, and export to CSV
What you’ll need
- A WordPress site (any version 6.8 or newer)
- About 10 minutes
- A free Neural Forms account (we’ll set this up in step 2)
You do not need:
- Coding knowledge
- A third-party AI service (OpenAI, Anthropic, etc.)
- A premium WordPress theme
- A page builder
Step 1: Install the form plugin
Log in to your WordPress dashboard. Go to Plugins → Add New Plugin. In the search box, type “Neural Forms” and press enter.
You’ll see Neural Forms in the search results. Click Install Now, then Activate when the button changes.
Neural Forms is free on WordPress.org. It includes the full form builder, the lead inbox, and 100 lifetime AI credits when you sign up. You do not need a paid plan to follow this guide.
After activation, you’ll see a new Neural Forms menu item in your WordPress sidebar.
Step 2: Set up AI
To enable AI features, you need a Neural Forms API key. This is a free account, no credit card required.
Go to Neural Forms → Settings. You’ll see a field for the Neural Forms API key.
Open https://neuralforms.ai in a new tab and click Get Free Account in the top navigation. Sign up with your email. After verification, you’ll see your API key in the account dashboard.
Copy the API key, paste it into the Settings page in WordPress, and click Test Connection. You’ll see a green confirmation when the connection works. AI controls now unlock throughout the plugin.
Your account starts with 100 free AI credits. One credit processes one form submission. That’s 100 free submissions analyzed.
Step 3: Build your contact form
Go to Neural Forms → Forms and click + New Form. You’ll see three options:
- Blank Form – start from scratch
- Choose a Template – pick from prebuilt templates
- Generate with AI – describe a form and let AI build it (Pro feature)
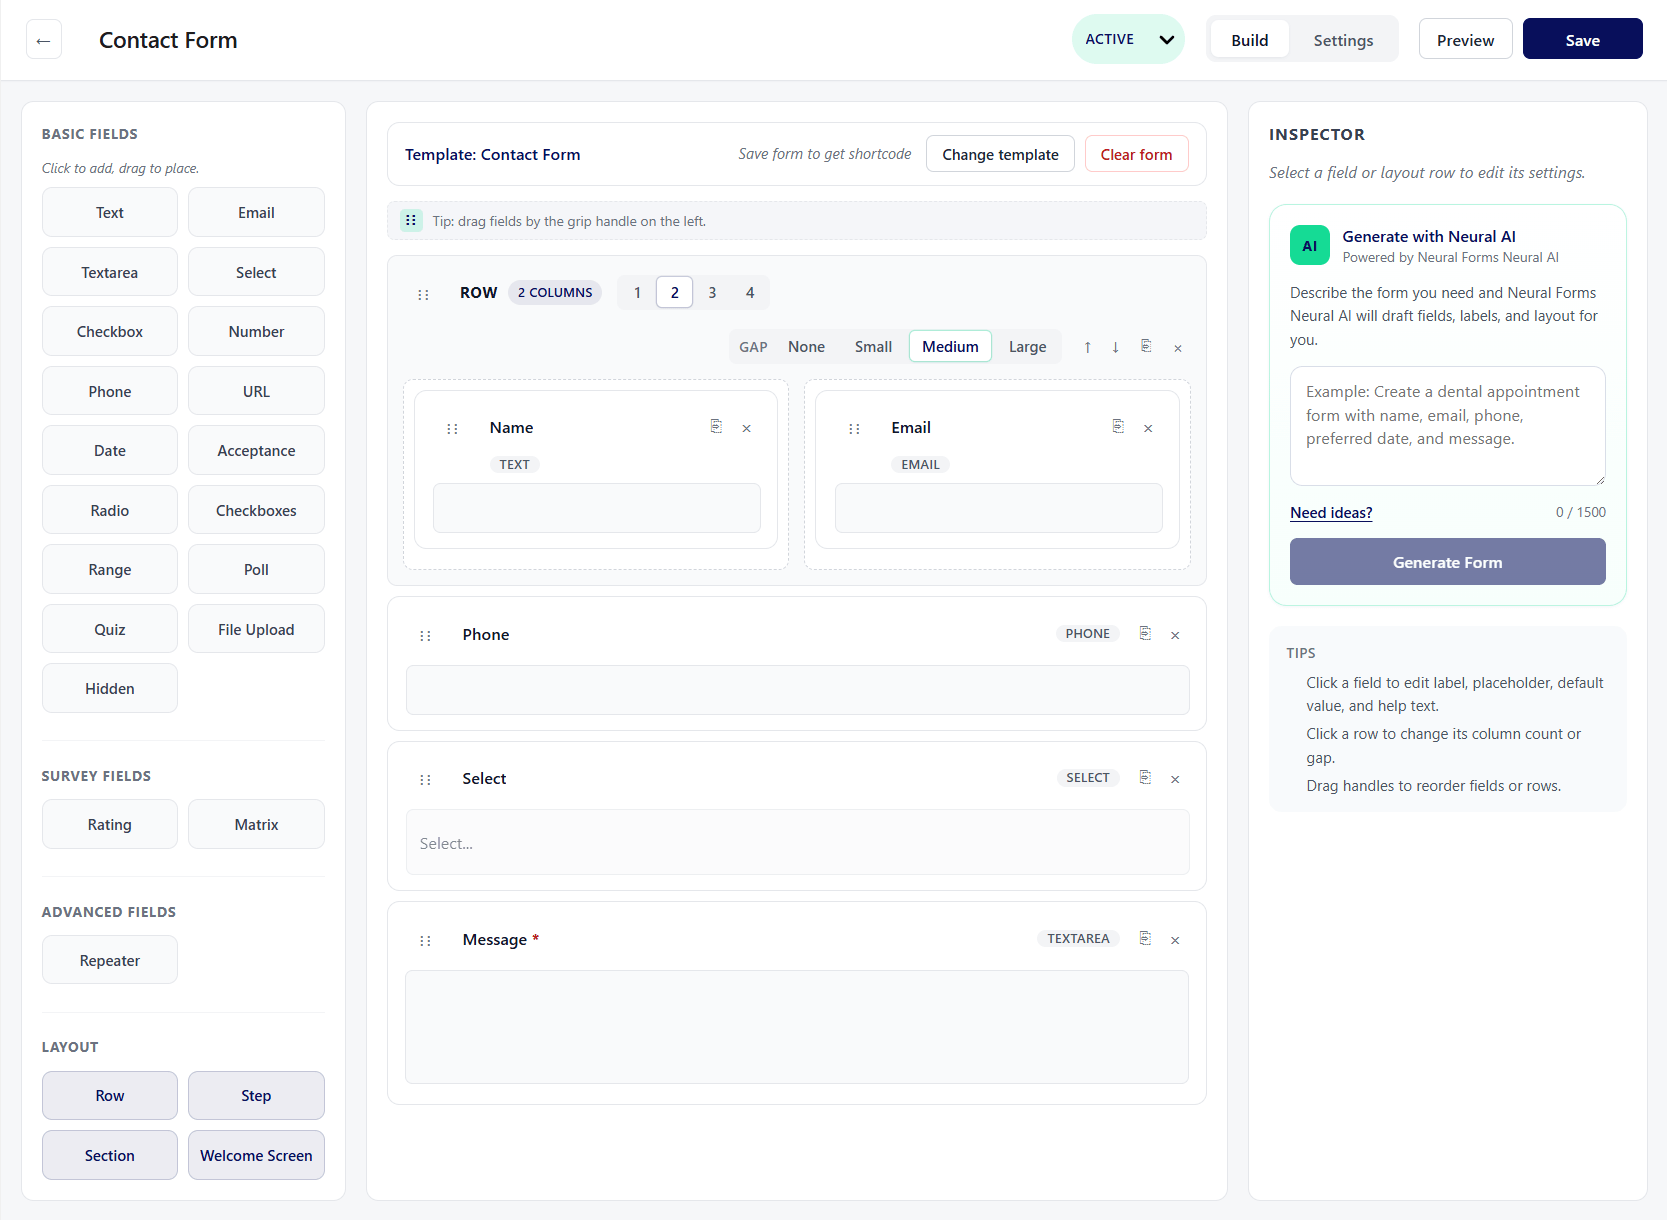
For a contact form, click Choose a Template and select Contact Form. The form is created with four fields: Name, Email, Phone, and Message.
You’re now in the form builder. The field library is on the left, your form preview in the center, and field settings on the right.
Customize as needed:
- Click any field to change its label, placeholder text, or validation rules
- Drag fields up or down to reorder
- Add new fields from the library (text, textarea, select, file upload, and 14 other types in the free version)
- Add a Row from the Layout section if you want two-column or three-column rows
When you’re done, click Save at the top right.
Step 4: Embed the form on your site
You have three ways to embed your form:
OPTION A: BLOCK EDITOR (RECOMMENDED)
Open any page or post in the block editor. Click the plus button to add a new block. Search for “Neural Forms” and select the block. Choose your contact form from the dropdown. Done.
OPTION B: SHORTCODE
Add this shortcode anywhere a shortcode works:
[neural-forms id="1"]Replace “1” with your actual form ID, which you can see next to your form in Neural Forms → Forms.
OPTION C: DIVI 5 MODULE (IF YOU USE DIVI)
If you have Divi 5 with the Pro version of Neural Forms, drop the Neural Forms module into the Visual Builder, choose your form, and customize styling.
Publish the page when you’re ready, and your form is live.
Step 5: Test the form
Open your published page in a different browser or incognito window. Fill out the form as if you were a visitor. Submit it.
Now go back to your WordPress admin and open Neural Forms → Inbox.
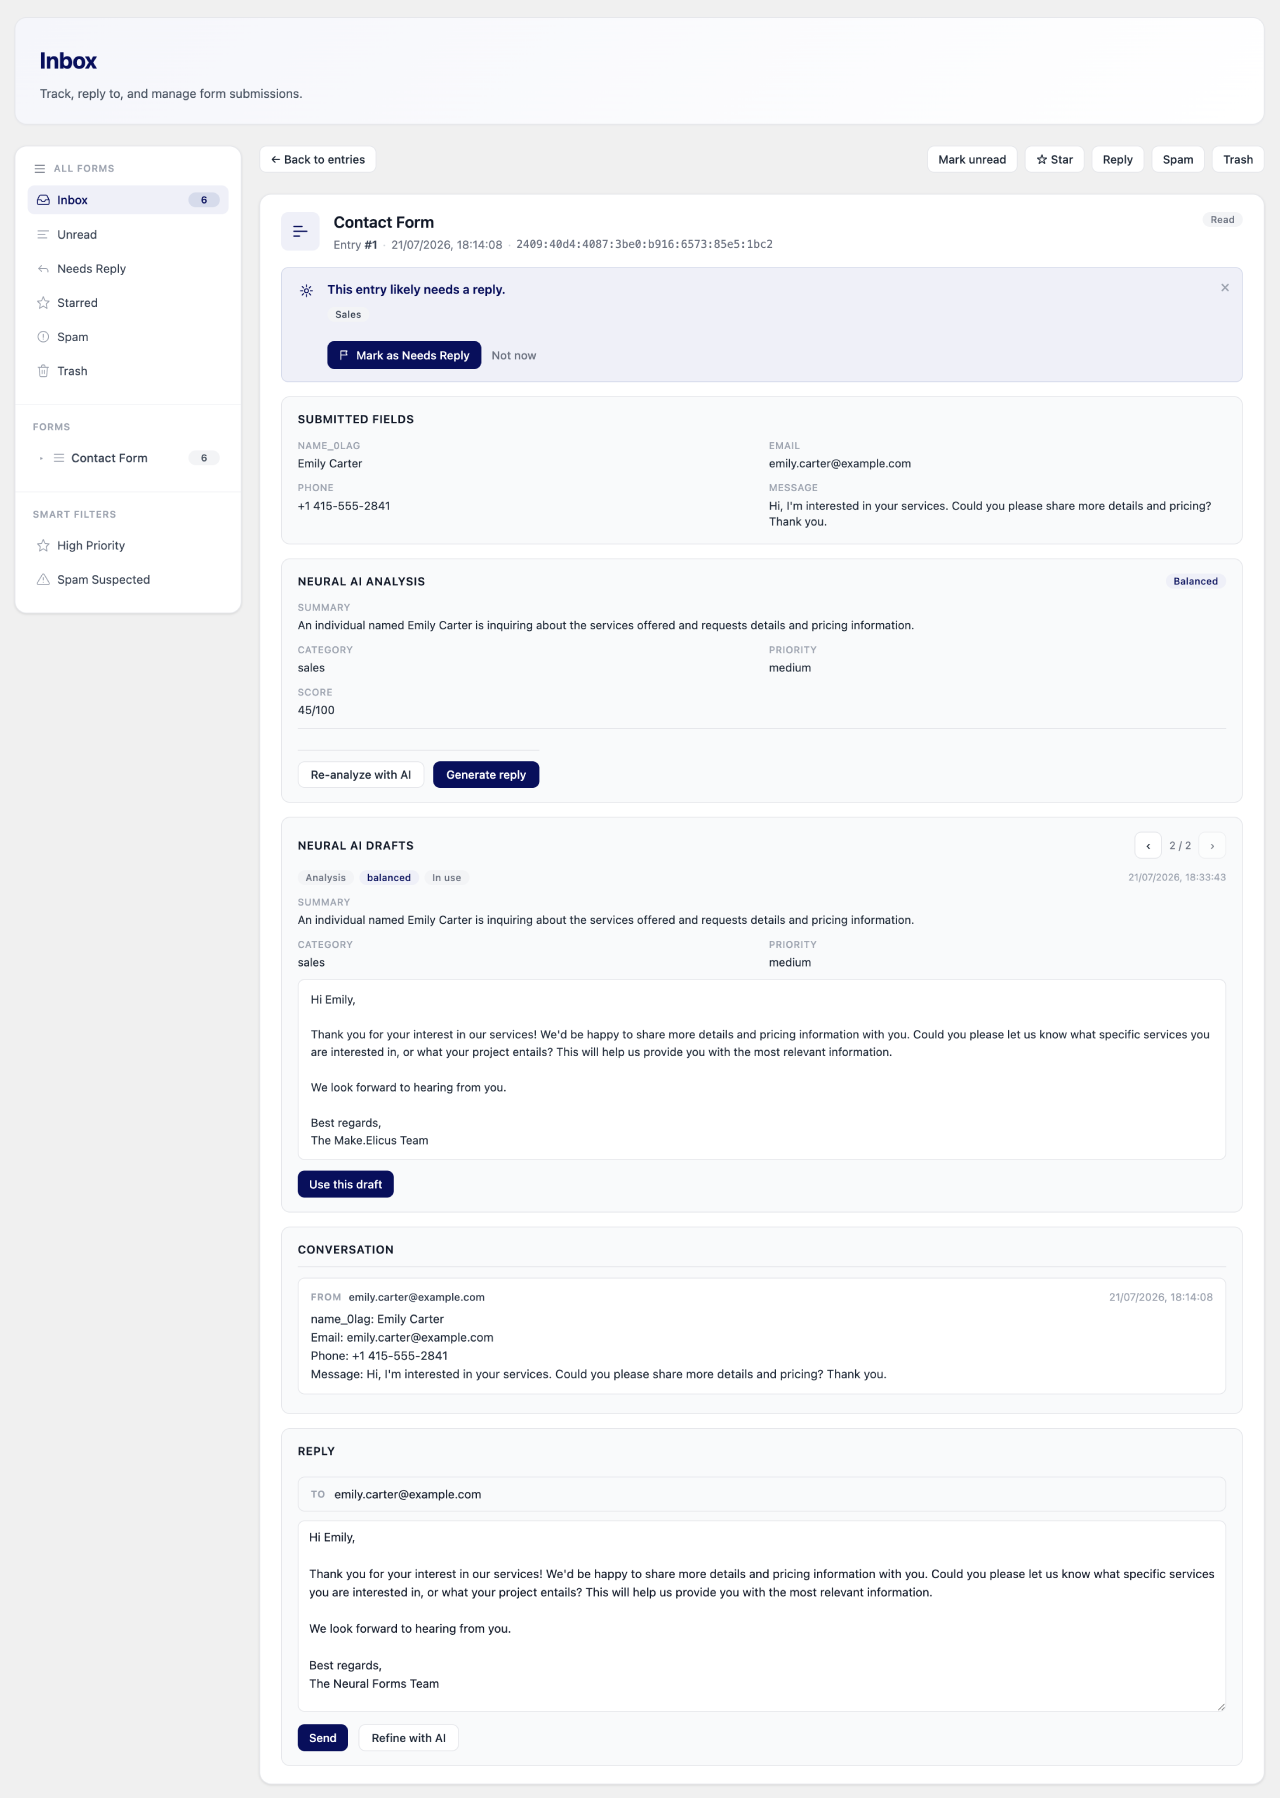
You’ll see your test submission in the inbox. Click it to open the entry detail. Within a few seconds, you’ll see:
- AI summary: A one-sentence summary of what the visitor said
- Category: Sales, support, inquiry, or complaint
- Priority score: 0 to 100, with higher numbers meaning higher priority
- Draft reply: A response ready for you to review and send from the inbox
That’s the whole workflow. You’ve gone from “submission sent to email” to “submission analyzed, categorized, prioritized, and drafted, all inside WordPress.”
How AI changes your workflow
Without AI, a typical WordPress contact form workflow looks like:
- Visitor submits form
- Email lands in your inbox
- You read, decide importance, write reply, send
With AI:
- Visitor submits form
- AI analyzes, categorizes, scores priority, drafts reply
- You review the draft, edit if needed, send (or revise) in 30 seconds
For one or two submissions a week, the time savings are small. For a site getting 20+ submissions a week, the difference compounds significantly. You triage in 10 minutes instead of 60.
Managing the lead inbox
The inbox is where you’ll spend most of your time. A few features worth knowing:
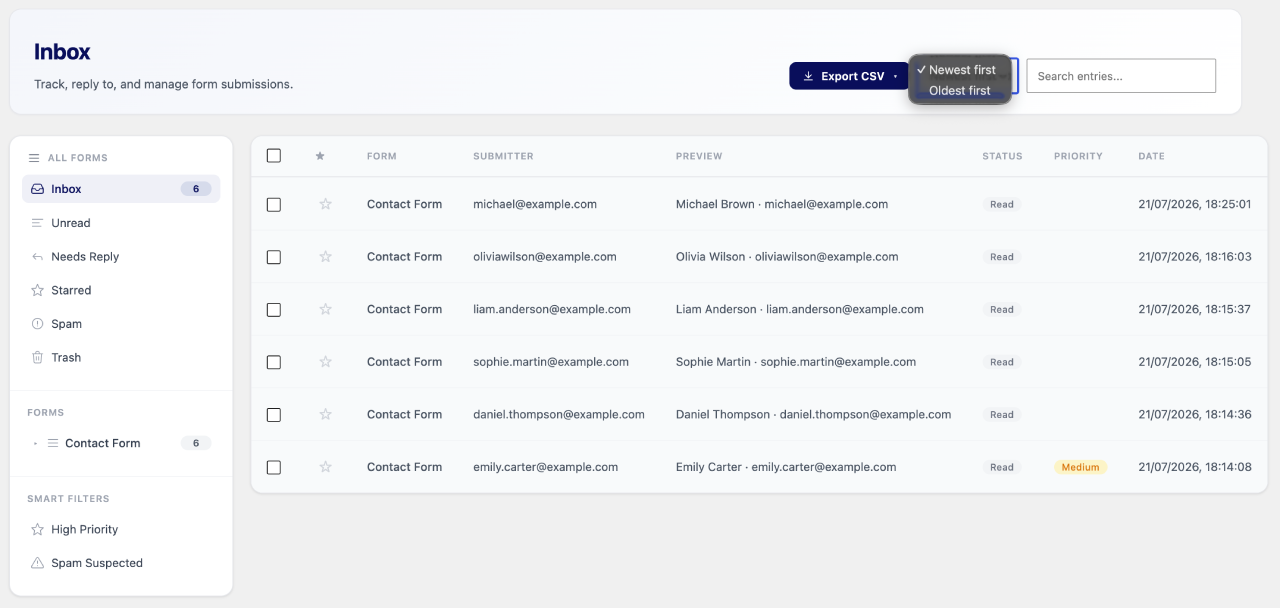
Status management: Mark submissions as new, read, spam, or trash. Bulk actions for marking multiple at once.
Starring: Star important leads to find them later.
Search: Search across all submissions by name, email, or content.
Date filters: Filter by last 7 days, last 30 days, this month, last month, or all time.
Per-form views: Click into any single form to see only its submissions. Useful when you have multiple forms (contact form, support form, newsletter signup, etc.).
CSV export: Export submissions to CSV with date filters. Useful for monthly reports or feeding into other tools.
Threaded replies: Open any submission to see the full thread, including replies you’ve sent and any follow-up messages.
When to upgrade to Pro
The free version covers most contact form needs. You’ll want to upgrade to Pro when:
- You run out of the 100 free AI credits and want continued AI analysis
- You want to push submissions to HubSpot, Mailchimp, Zapier, WhatsApp, or import from Google Forms
- You need AI form generation (describe a form in plain English, AI builds it)
- You want smart spam detection with adjustable threshold
- You want the polish and regenerate features on AI drafts
- You manage multiple sites and want one license to cover all of them
Pro starts at $99 per year for Starter (7,500 AI credits annually, unlimited sites) and $199 per year for Agency (25,000 credits, unlimited sites).
What to do next
You have a working contact form with AI analysis. A few follow-up things to set up:
- Set up email notifications. Go to your form’s Settings tab, open the Notifications section, and configure who gets emailed when a submission comes in. Even with the inbox, you may want email alerts for high-priority leads.
- Add CAPTCHA spam protection. In Neural Forms → Settings, choose Cloudflare Turnstile or Google reCAPTCHA v2. Both are free and reduce spam significantly.
- Enable Privacy Mode if you’re GDPR-conscious. Toggle Privacy Mode on to skip IP and user-agent storage on submissions.
- Create more forms. Build a support form, a newsletter signup, a quote request, an event registration. Each form has its own inbox view, its own AI configuration, its own integrations.
Frequently asked questions
Do I need to use AI?
No. The form builder, inbox, email notifications, CAPTCHA, and CSV export all work without an AI key. AI is optional and additive.
Does AI replace human review?
No. AI suggests categories, priorities, and draft replies. You review and decide what to send. Nothing goes out automatically.
Is the AI accurate?
In most cases, yes. The summary captures the main point, the category is correct for most submissions, the priority score reflects buying signals or urgency. Edge cases (sarcasm, multi-language submissions, very short messages) sometimes get misclassified. You review before sending.
What happens when I run out of AI credits?
On the free plan, AI features pause after the 100 lifetime credits. The form builder, inbox, and basics keep working without AI.
Can I use this on multiple sites?
The free version works on unlimited sites, each with its own 100 AI credits. Pro plans (Starter and Agency) also cover unlimited sites with a higher annual credit allocation.
What if my form is in a language other than English?
Neural Forms AI supports submission analysis in English, Spanish, French, German, Portuguese, Italian, Dutch, and many other languages. Summaries and categories are generated in the same language as the submission.
Get started
Neural Forms Lite is available on WordPress.org. Search for “Neural Forms” in your WordPress admin or download it from neuralforms.ai.

Leave a Reply