

Contact Form 7 sends an email when someone submits a form, and that is where the submission lives. If the email goes to spam or never arrives, the message is gone, because the plugin does not keep a copy on your site. Add the wish for multi-step forms, conditional fields or a place to reply to leads, and many site owners start looking for a way out.
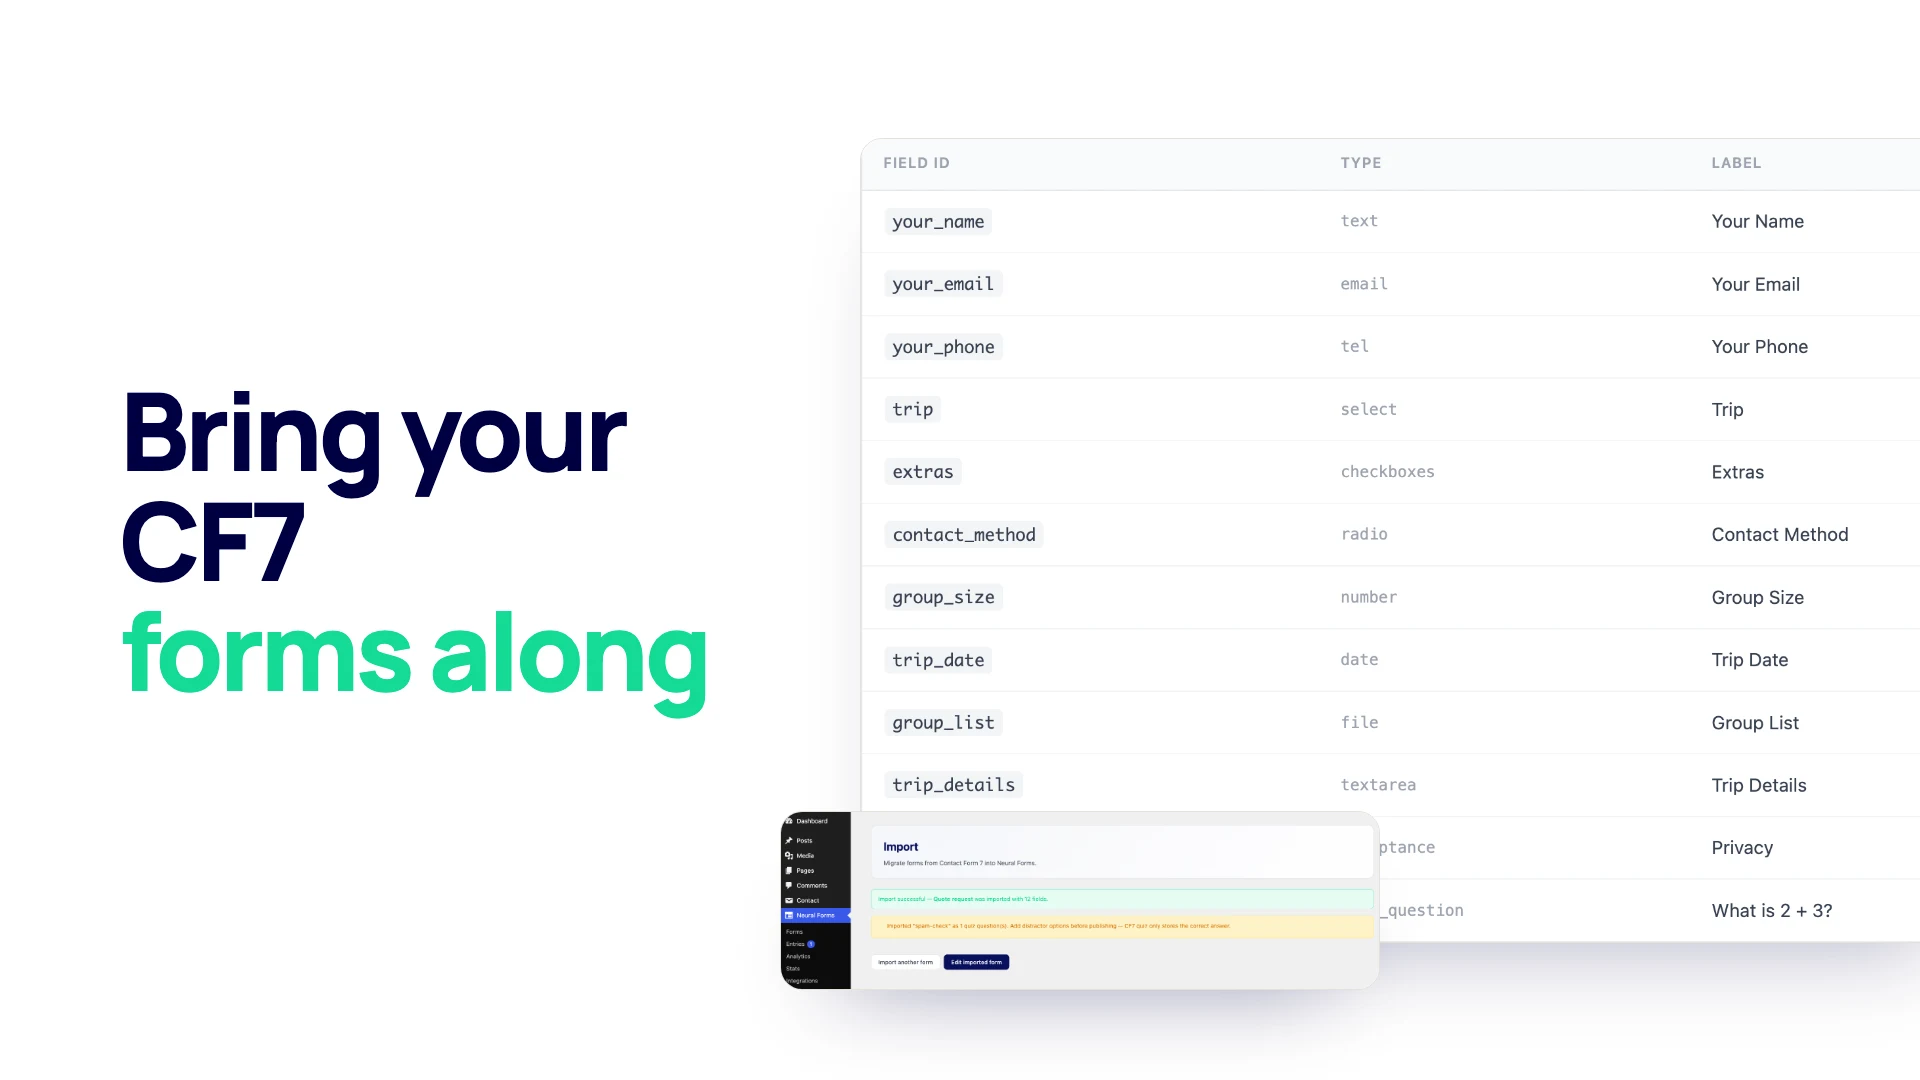
Moving does not mean rebuilding every form by hand. The free Neural Forms plugin has an importer that reads your Contact Form 7 forms and creates matching forms with the same fields. This guide walks through a real import of a quote request form with 12 fields, shows exactly what came across and what did not, and lists the checks to run before you switch Contact Form 7 off. Everything here was done on a WordPress site with only Contact Form 7 and the free Neural Forms plugin active.
Before you start
- Back up your site. The importer only reads your Contact Form 7 forms and never changes them, but a backup is the right habit before swapping anything on live pages.
- Keep Contact Form 7 active. The importer reads forms through Contact Form 7 itself. If it is deactivated, the Import item disappears from the Neural Forms menu.
- List every page that shows a form. In Pages (and Posts), search for
contact-form-7. The search covers page content, so it finds every page that uses the shortcode. Note them; you will swap each one later. The search only covers page and post content, so also check widgets, footers and any page-builder layouts that store content elsewhere. - Install Neural Forms. Go to Plugins > Add New, search for “Neural Forms”, install and activate it. It is free and needs no account.
Step 1: Open the Import screen
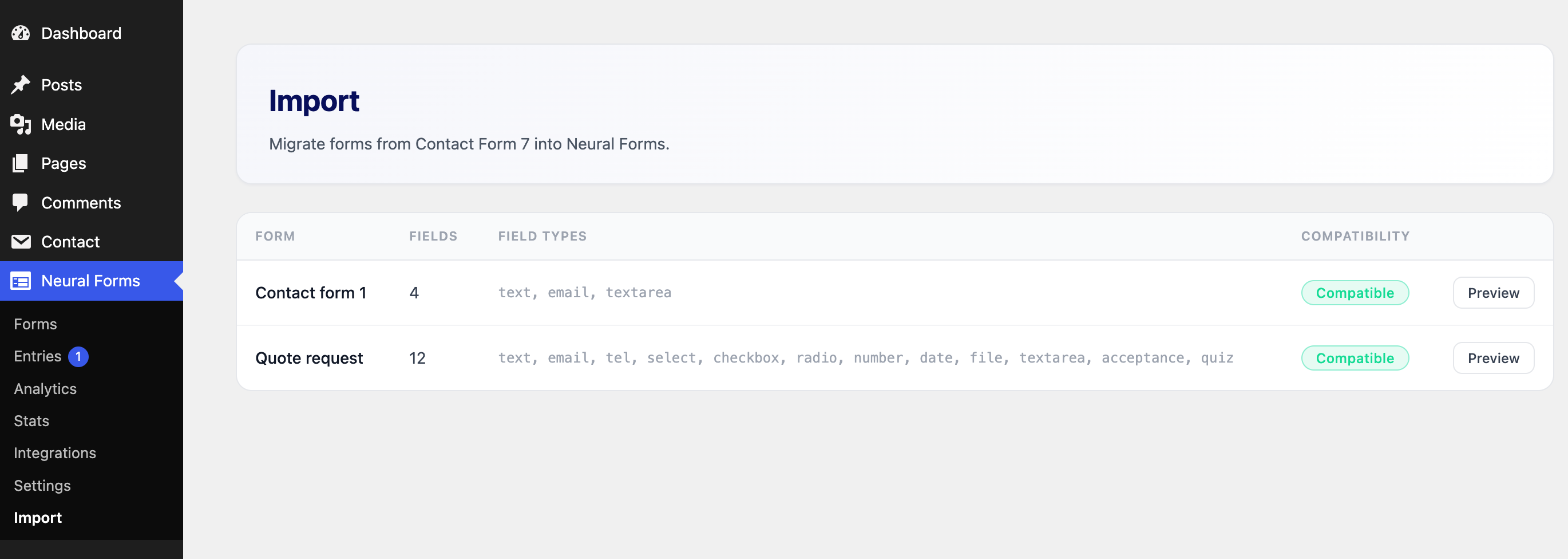
Go to Neural Forms > Import. The screen lists every Contact Form 7 form on the site with its number of fields, the field types it uses, and a Compatibility badge: Compatible when every field can be imported, Partial when some will be skipped.
Step 2: Preview the form before importing
Click Preview next to a form. You get the list of fields that will be created, with the Field ID, Type, Label and whether each one is Required. Fields marked with an asterisk in Contact Form 7 (such as [text* your-name]) come across as required.
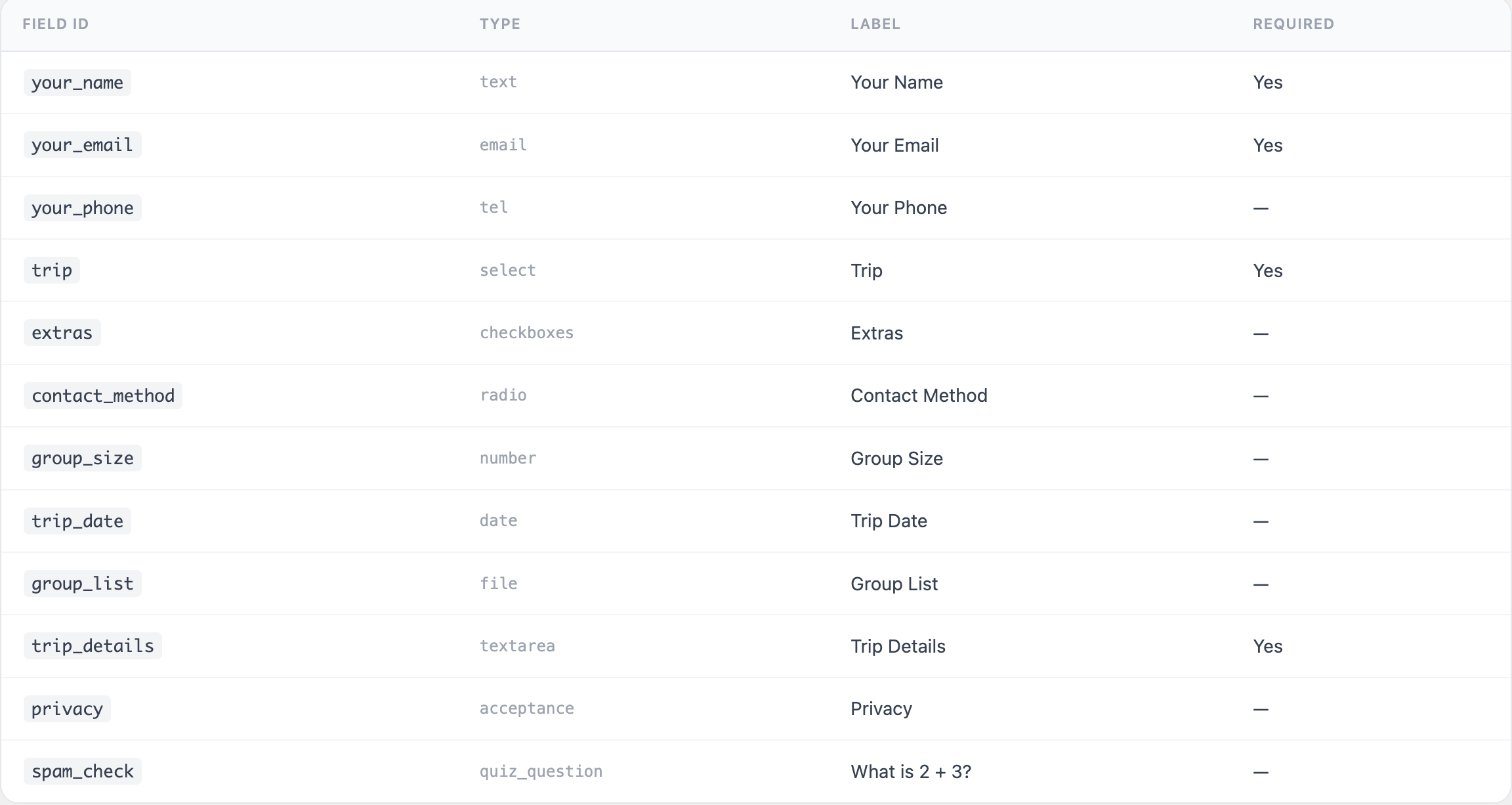
Look at the Label column. Labels are built from each field’s name in Contact Form 7, not from the text in your <label> tags. A field named your-name becomes “Your Name”, and a field named extras becomes “Extras” even if the visible label on your old form said “Extras you want”. You can rename them after the import.
Step 3: Read the warnings
Below the field list, the preview shows anything that needs your attention. Our form had a Contact Form 7 quiz question used as a spam check (“What is 2 + 3?”). It was imported as a Neural Forms quiz question, with a note that Contact Form 7 only stores the correct answer, so you need to add the other options yourself.
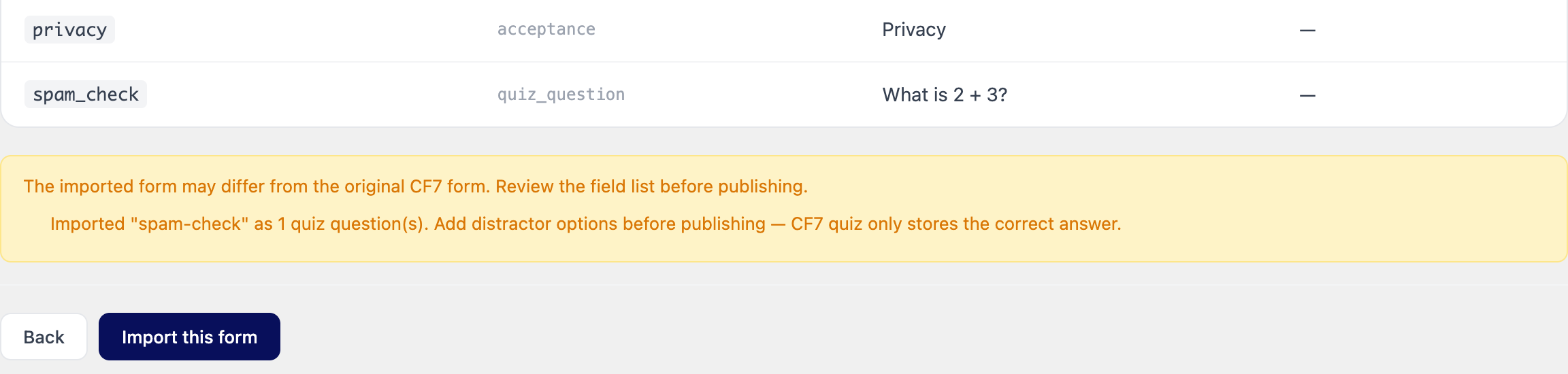
Some Contact Form 7 tags are skipped and listed as skipped fields: the CAPTCHA tags (captchac and captchar), recaptcha, turnstile, stripe, the character count tag, the reflection, output and response tags, and submit. Tags added by other Contact Form 7 add-ons are skipped as unknown types. Spam protection and the submit button are set up in Neural Forms instead, as covered below.
Step 4: Import the form
Click Import this form. The success message confirms the form name and the number of fields, and gives you Edit imported form and Import another form.
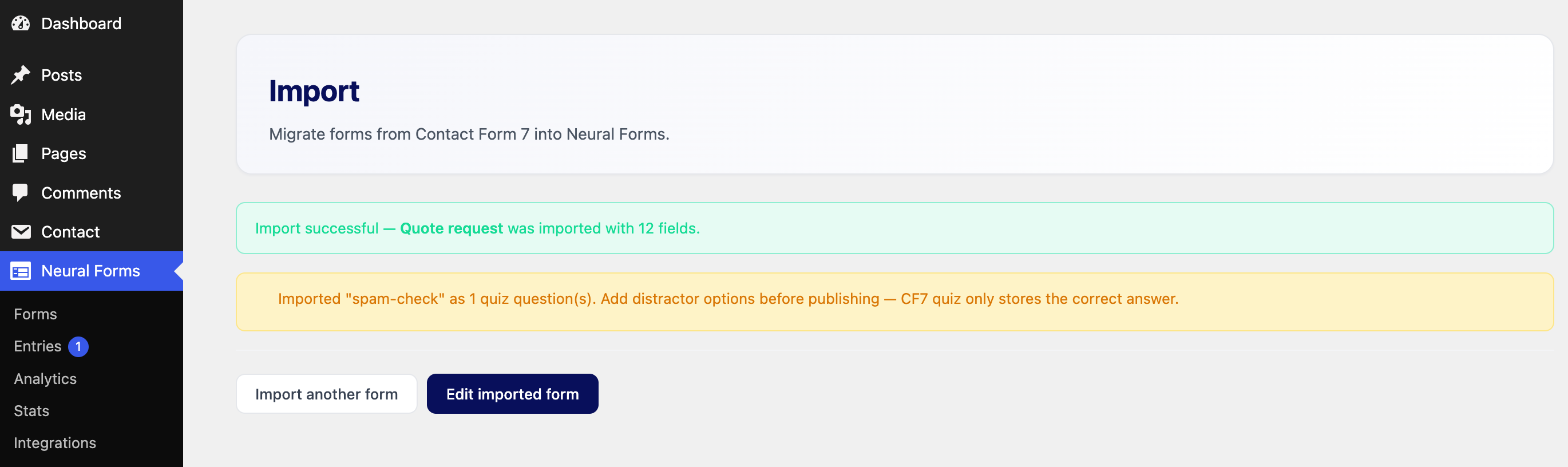
Two things to know:
- The new form is created as a Draft. It does not show on your site until you set it to Active, so you can import everything first and switch pages over one at a time.
- Importing the same form twice is caught. If you try, the importer says the form was already imported and asks before creating a second copy.
What carries over, field by field
| Contact Form 7 tag | Becomes in Neural Forms | What comes with it |
|---|---|---|
| text, email, url, tel, number, textarea | Text, Email, URL, Telephone, Number, Textarea | Required, default value; min, max and step for numbers |
| select, radio | Select, Radio | Required, every option |
| checkbox | Checkboxes (a list) | Required, every option |
| date, range | Date, Range | Required, min and max (and step for range) |
| file | File Upload | Required, allowed file types |
| acceptance | Acceptance | The checkbox, but not the Required setting (see below) |
| hidden | Hidden | Default value |
| quiz | Quiz question | The question and the correct answer only |
| captchac, captchar, recaptcha, turnstile, stripe, count, reflection, output, response, submit, add-on tags | Skipped | Listed in the import results |
The importer copies fields. Your Contact Form 7 Mail and Mail (2) settings, its Messages, its additional settings, and any submissions stored by an add-on are not imported. Each of those has a replacement in Neural Forms, covered in step 6.
Step 5: Check the imported form
Click Edit imported form. The form opens in the builder with a Draft status at the top. Click each field and check it against the original. In our import, these needed attention:
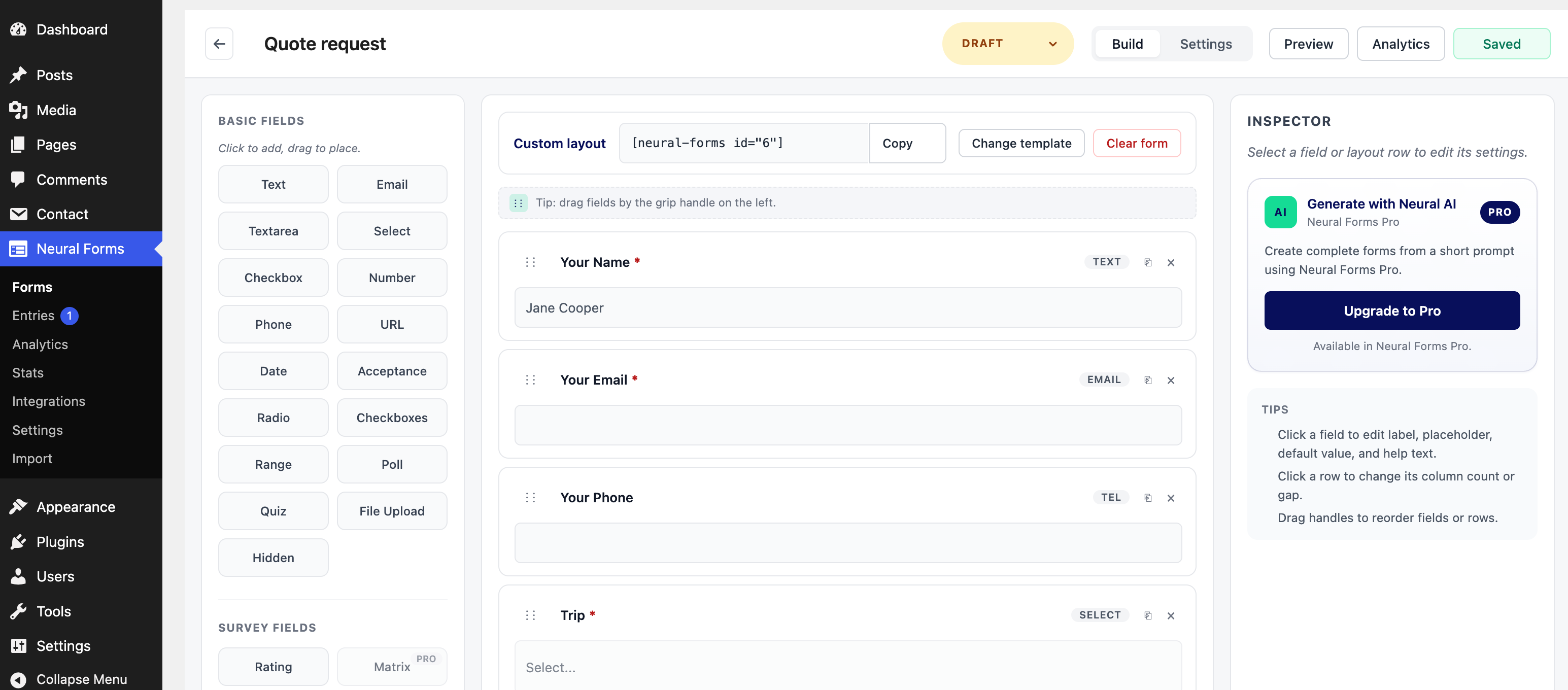
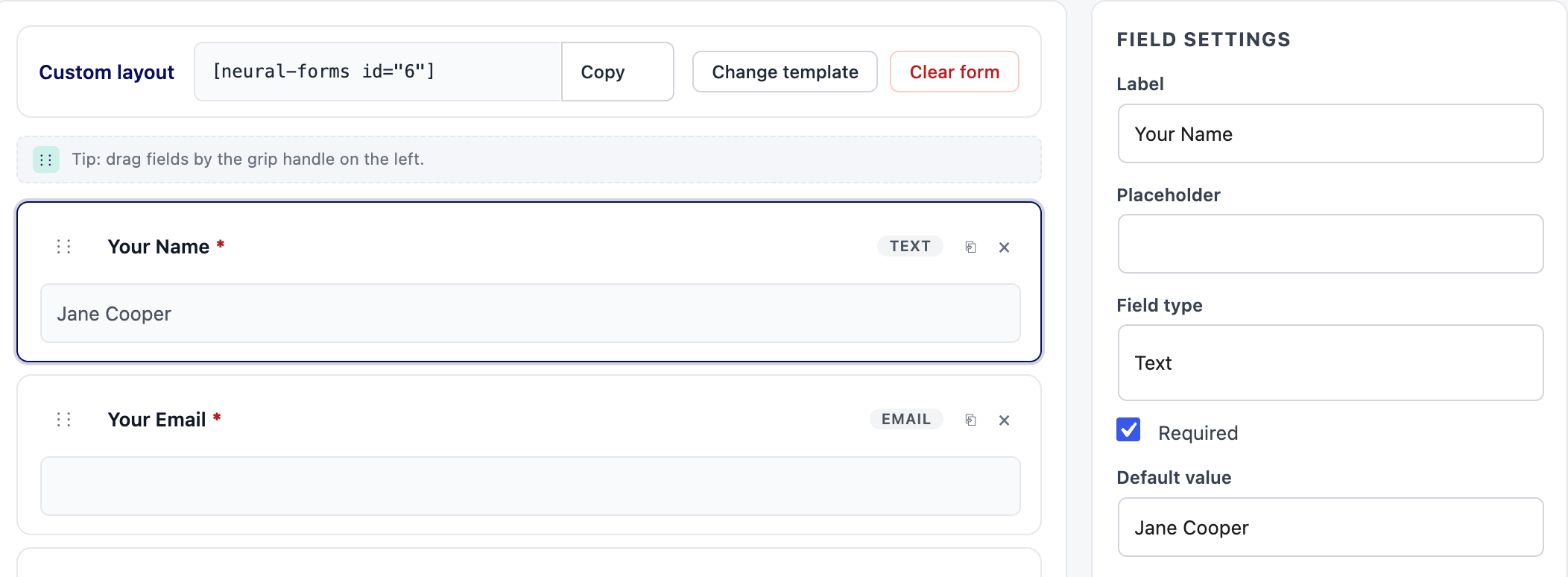
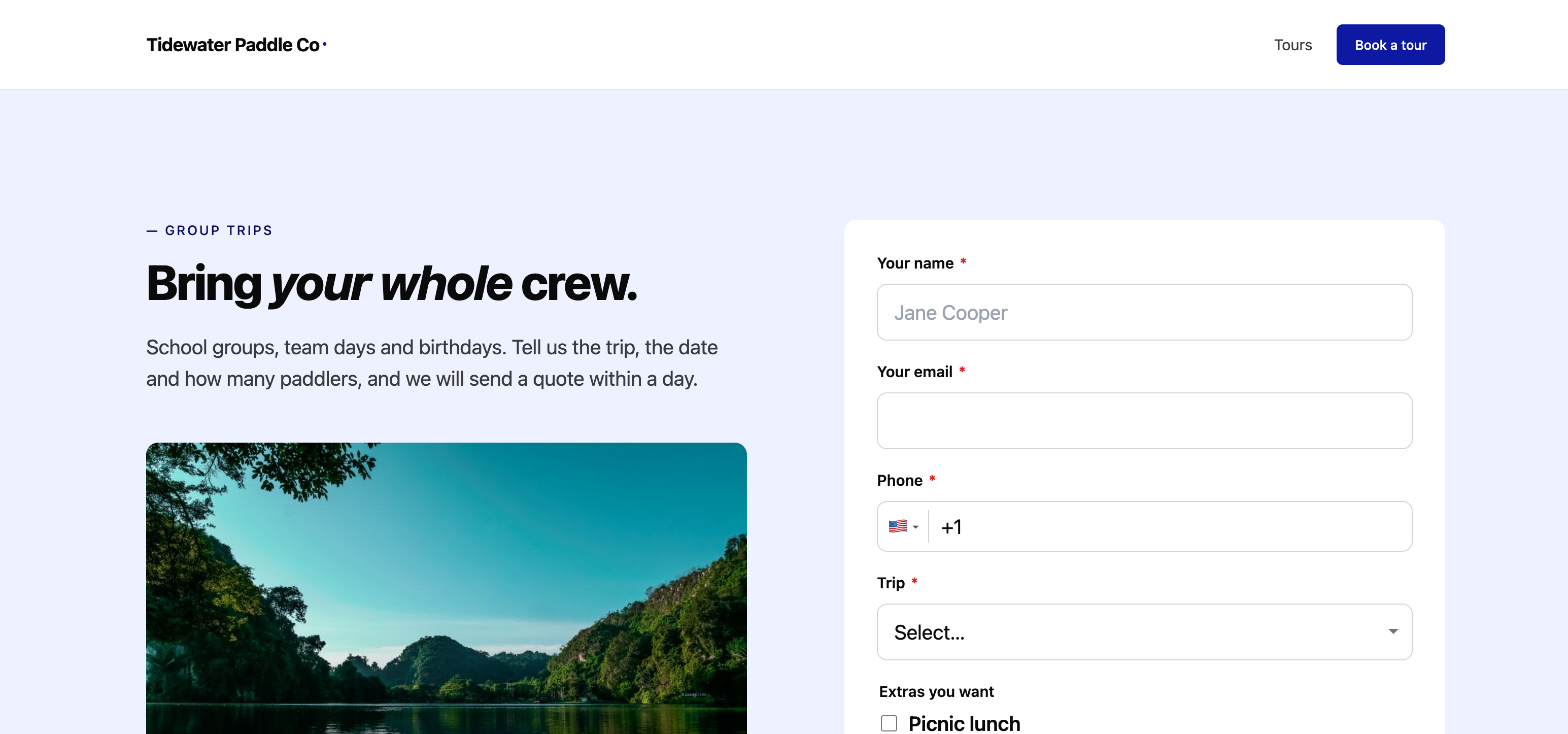
- Placeholder text became a pre-filled value. Contact Form 7 writes placeholders as
[text* your-name placeholder "Jane Cooper"]. In Neural Forms 1.1.2 that text arrives in the field’s Default value, so the live form starts with “Jane Cooper” typed in. Move the text to Placeholder and clear Default value. Check every field that had a placeholder. - The acceptance checkbox is not required. In Contact Form 7 an acceptance box must be ticked to submit. After the import, tick Required on it.
- File size limits are not kept. Our
limit:2mbdid not come across, and a limit written in bytes (such aslimit:1048576) arrives far too large. Set the maximum file size on the File Upload field again. - Default choices on radio buttons are not kept. A
default:1option was dropped, so no option starts selected. Set a Default value if you need one. - Labels. Rename any label that was built from the field name (“Your Email” to “Your email”, “Extras” to “Extras you want”).
- The quiz question. If it was only there to stop spam, delete it and use Neural Forms’ spam protection instead (step 6).
- An optional phone field. If the phone field is not required, leaving it empty blocks the form in version 1.1.2, because the field holds its country code. Mark it required, or remove it if you rarely call.
These are the gaps we found on our form; yours may have others, which is why the importer itself says to review the field list before publishing.
Step 6: Set up emails, messages and spam protection
Because mail settings do not carry over, set these up before the form goes live:
- Admin email (Contact Form 7’s Mail tab). In the form’s Settings > Notifications, turn on the admin notification and enter the addresses that should receive each submission. You do not need mail tags like
[your-name]: the notification includes the submitted fields. - Confirmation to the visitor (Mail (2)). Go to Neural Forms > Settings > Notifications and turn on Autoresponder. It emails the person who submitted when their entry contains an email address. Set the sender name and address under Email Settings, then click Save settings.
- Messages. In the form’s Settings > On success, write the thank-you message, or choose Redirect to a URL to send people to a thank-you page. On error sets what people see when a submission fails.
- Spam protection. Under Neural Forms > Settings > CAPTCHA, choose Cloudflare Turnstile or reCAPTCHA v2 and add your keys.
Step 7: Swap the form on each page
- In the builder, change the status from Draft to Active and save.
- Open the first page from your list. Remove the Contact Form 7 shortcode block.
- Add the Neural Forms block, choose the imported form, and turn on Show Field Labels in its display settings. If you prefer shortcodes, copy the one shown at the top of the builder, such as
- If your Contact Form 7 button had custom text, such as “Send request”, enter it in the block’s Submit Button Text setting.
- Update the page and repeat for the others.
Step 8: Test, then switch Contact Form 7 off
- Submit each new form once with your own email address.
- Check that the entry appears in Neural Forms > Entries. This is the part Contact Form 7 never had: every submission is kept on your site, even if an email fails.
- Check that the admin email and the confirmation email arrive. If they do not, use Send test email in Neural Forms settings, and consider an SMTP plugin.
- Try the form with a required field left empty, and upload a file if the form has a file field.
- Search Pages and Posts for
contact-form-7once more. When nothing is left, deactivate Contact Form 7 and any of its add-ons.
What about old submissions?
Contact Form 7 does not store submissions itself, so in most cases there is nothing to move: past messages are in your email. If you used a storage add-on for Contact Form 7, export its entries from that add-on before you remove it, because the Neural Forms importer brings across forms only. New submissions from the switch onward are stored in the lead inbox, where you can search, star, reply to and export them as CSV.
Frequently asked questions
Is the Contact Form 7 importer free?
Yes. The importer is part of the free Neural Forms plugin on WordPress.org. You do not need an account or an API key.
Will importing change or delete my Contact Form 7 forms?
No. The importer reads your Contact Form 7 forms and creates new Neural Forms forms from them. The originals stay exactly as they were until you deactivate Contact Form 7.
Does it import my email settings and messages?
No, it imports fields only. Set up the admin notification, the autoresponder and the success message in Neural Forms after the import.
Does it import past submissions?
No. Contact Form 7 does not store submissions on its own, and entries kept by a storage add-on are not imported. Export them from the add-on first if you need them.
Do I need to keep Contact Form 7 installed?
Only until the import is done. The importer needs Contact Form 7 active to read the forms. Once every page uses a Neural Forms form and you have tested them, you can deactivate it.
Can I import the same form again?
Yes. The importer tells you the form was already imported and asks before it creates a second copy, so you will not end up with duplicates by accident.
Make the switch one form at a time
Import everything, check each form against the list in step 5, set up emails, then swap pages one by one with Contact Form 7 still running underneath. For a short overview of the importer, see Contact Form 7 migration in Neural Forms, and set up spam protection before your new forms go live.

Leave a Reply